


For this project, all you need is SketchUp and an internet browser.
SketchUp is a free and fun web-based program for 3D modeling. You can use SketchUp to design just about anything, from furniture to a dream bedroom to an entire city. Click here for the site.
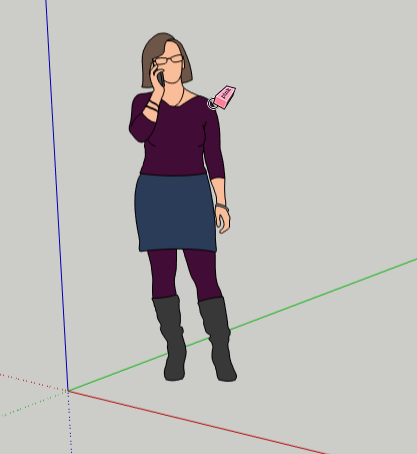
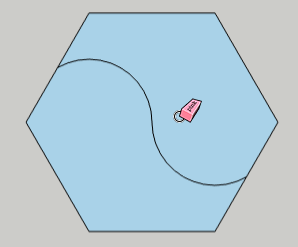
When you start modeling in SketchUp, you start in this view, with Helen standing on the ground. She isn’t needed in this model, so press E for the Eraser, and click on any of Helen’s edges.
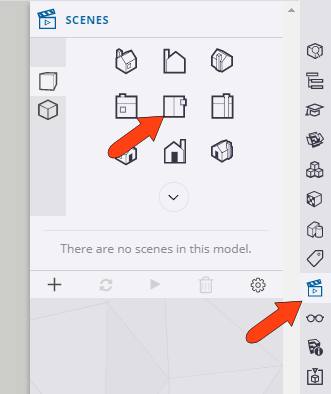
Along the right side of the screen, click the “movie scene” icon to open the Scenes window. Then click the icon in the middle of the Scenes window, which looks like the top of a house. This brings the model into Top view, also called birds’s-eye view.
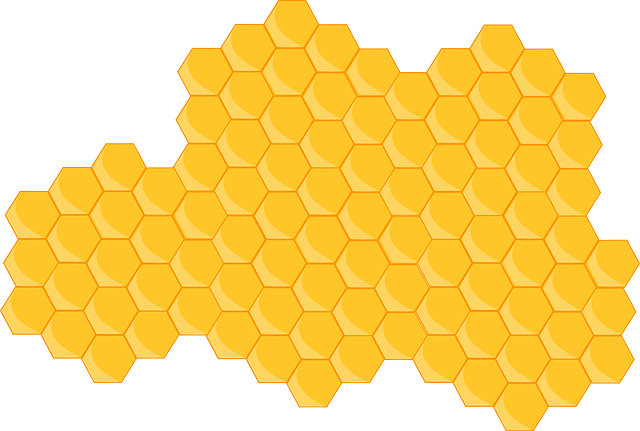
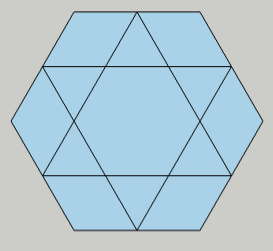
The pattern we’ll be making is based on hexagons – 6-sided polygons that can repeat next to each other without any spaces between. Think of a honeycomb, which is made of hexagon-shaped cells.
Open the Rectangle fly-out toolbar on the left, and click the Polygon tool.
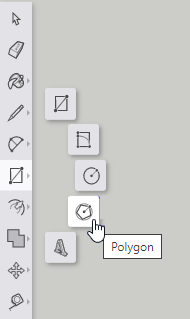
Look in the field at the lower right corner, which shows the number of sides. If you don’t see the number 6 in this field, type 6 and press Enter. (Don’t click in the field, just type and the number will appear there.)

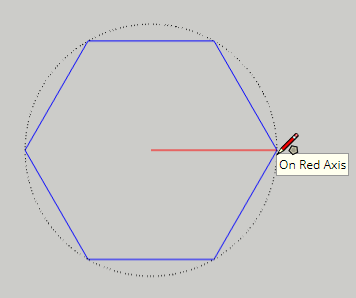
Click anywhere to place the center of the hexagon. For the second point, move your mouse to the right or left (red direction), then click again.
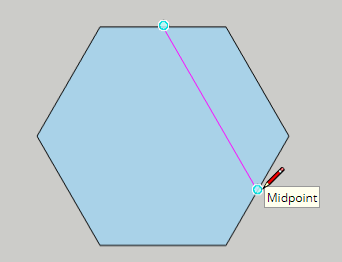
Now we need some construction lines inside this hexagon. Press L to activate the Line tool, and create this line, from midpoint to midpoint.
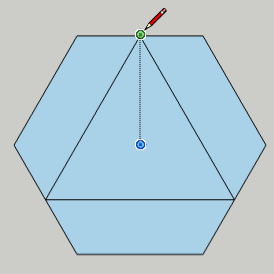
Complete a triangle, by drawing lines between two other sets of midpoints.
Create another triangle, using midpoints of the three edges not used in the previous triangle. You should have a six-pointed star inside the hexagon.
Now we can add the curves. Press A for the Arc tool. Arcs are created by clicking three points: start, end, and a point along the arc. Start the arc by clicking the top left corner of the star.
(Whenever you’re working in SketchUp, it’s important to click exact points, such as midpoints or endpoints. Always be sure to look for the popup that tells you what a point is, before you click.)
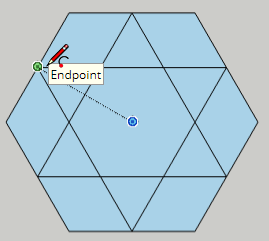
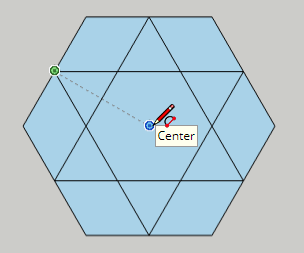
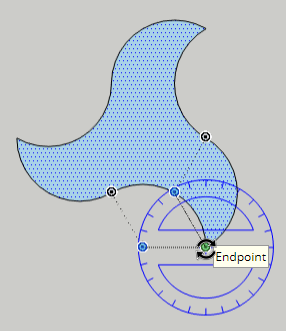
For the second point – the end of the arc – click the center of the hexagon.
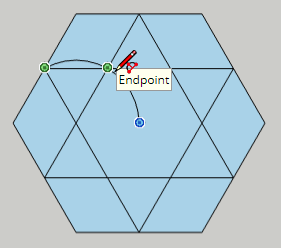
The last point defines the “bulge” of the arc. Click the point shown below: where two of the star triangles meet.
With the Arc tool still active, create a mirror-image of the first arc.

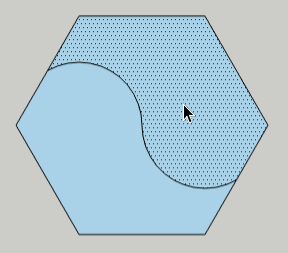
Now with the Eraser (press E), erase everything inside the hexagon except for the two arcs you just added. When erasing, you can click each edge one by one, or drag the mouse to sweep over everything you want to erase.
Now we’re ready to make some rotated copies. First, we need to select what we want to copy. Press the Spacebar for the Select tool, and click either half of the hexagon.
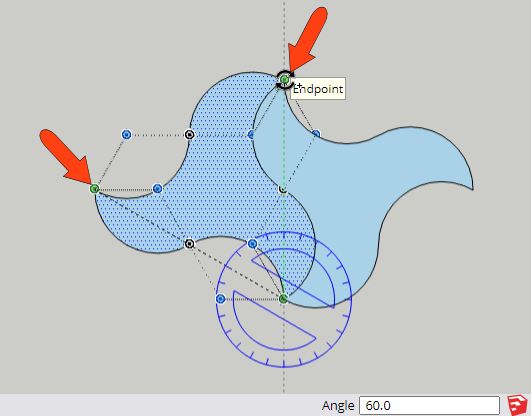
Press Q for the Rotate tool, which is another three-click tool. The first point to click is the center of the hexagon.
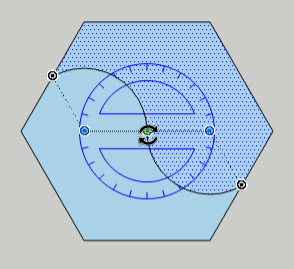
The next two clicks define the angle of rotation. First, tap (don’t hold) the Ctrl key on a PC, or the Option key on a Mac. This adds a “plus” sign to the cursor, which means copies will be made. Then click any two adjacent (neighboring) corner points of the hexagon. The field in the lower right shows the rotation angle, which should be 60 degrees.
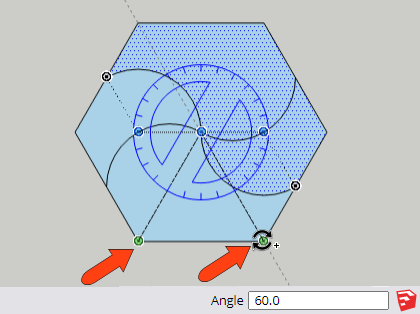
Once the first copy is created, you can add more copies. Instead of one copy, we want two, so type 2x, which appears in the Angle field, and press Enter. Now things are starting to look more like a pinwheel.
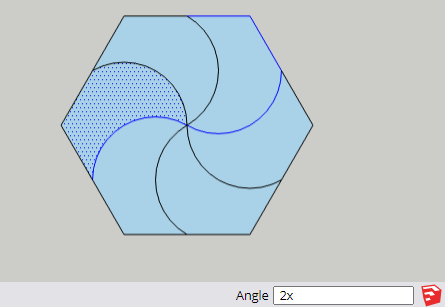
We’re going to make more rotated copies, so go back to the Select tool (Spacebar) and click one of the six curvy shapes.
Activate Rotate again (Q shortcut) and place the center at the selected shape’s hexagon corner.
Like before, tap Ctrl or Option for copies. For the first rotation point, click where shown below along the hexagon edge:
For the second rotation point, click the shape corner along the other hexagon edge.This time the rotation angle should be 120 degrees.
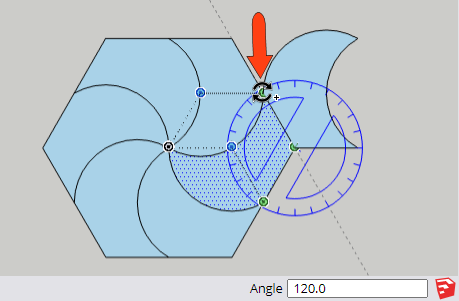
As before, enter 2x, which produces a total of three curvy shapes that share a corner.
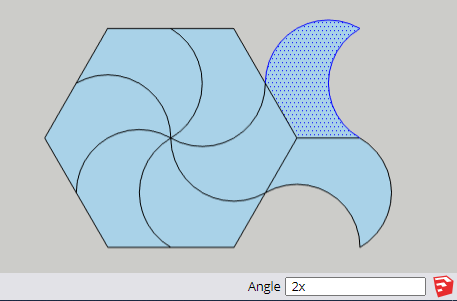
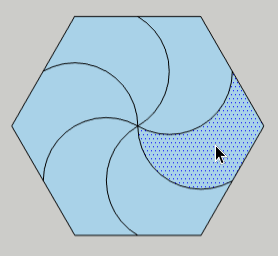
Erase everything except for these three shapes.
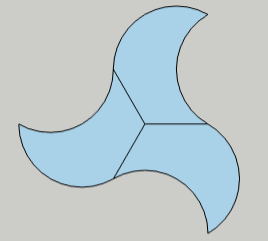
Then erase the three edges inside the shape. This is the pinwheel shape we’ll be copying to complete the pattern.
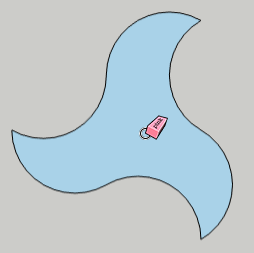
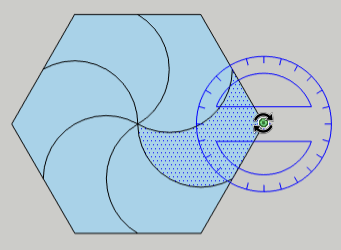
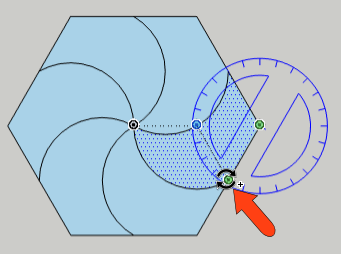
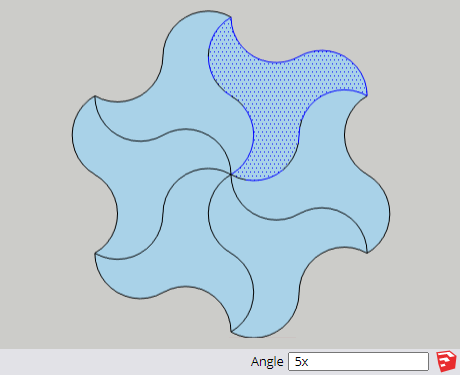
Select the pinwheel shape, activate Rotate, and place the center at any of the pinwheel corner points.
Tap Ctrl / Option for copies, and for the two rotation points, click the other two corners of the pinwheel shape. The angle is 60 degrees this time.
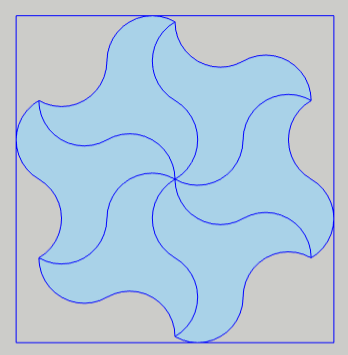
To complete the repeating shape, enter 5x. Now we have six pinwheels spinning around one center point.
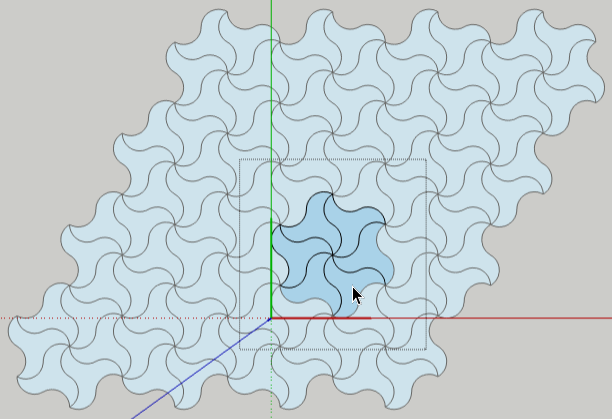
Because all of this is based on a hexagon, which tiles completely in all directions, this shape will tile as well. And because we’ll be making many copies of this object, it should be made into a component. (We’ll see the reason for this in another few steps.)
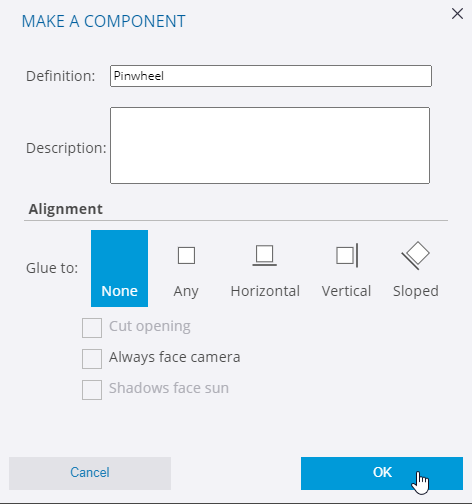
Press Ctrl + A (PC) or Cmd + A (Mac), to select all six shapes we have so far. Then right-click on any selected shape and choose Make Component.

Give the component any name you like, and click OK.
Once a component is created, it acts as a single object, no longer a set of six individual faces and their edges. And it is highlighted in blue, which means it’s selected. Leave it selected.
Press M for the Move tool, and tap Ctrl / Option for copies. For the first copy, click the two points shown below, for a copy that fits perfectly along its neighbor.
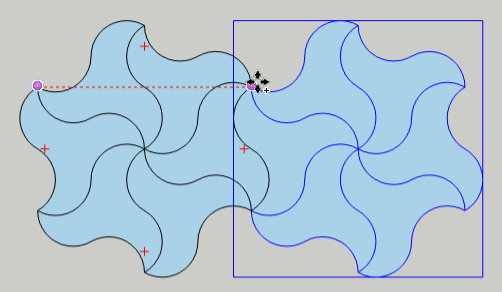
Enter 3x, or 4x, or any number you like, to make a row of components.
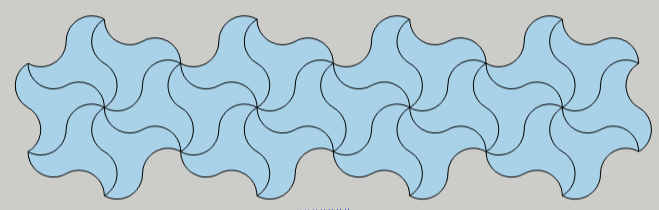
Select everything again, press M again, and copy the entire row diagonally, up or down, so that the copies fit perfectly.

Enter 3x, or the number you prefer, to complete the repeating pattern.

Now we’ll see why we used components: when you change one, the rest change as well. With the Select tool active, double-click on any component to “open” it for editing. That component appears in a dotted-line box, and the rest of the components are faded in the background, not available for editing.
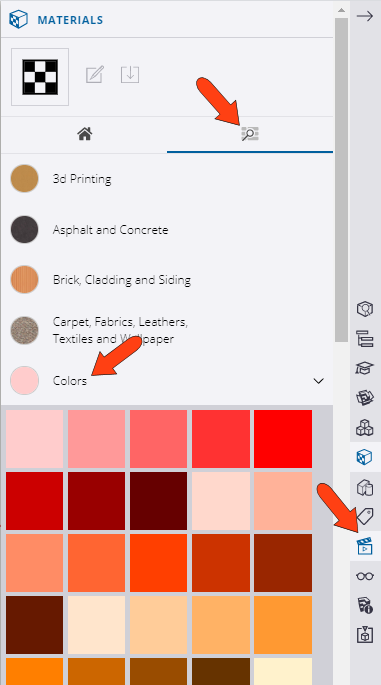
To get the list of colors, click the Materials icon along the right. In the Materials window, click the Search icon at the top, which opens the list of material categories. Open the Colors category.
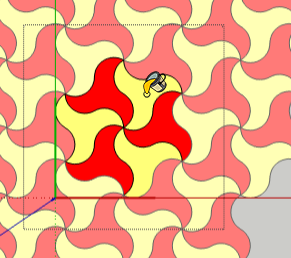
Now you can paint your component however you like. In this example, just two colors were used, to paint alternating shapes. As you paint the component, the other components. get painted as well.
To end the editing, go back to the Select tool and click once anywhere outside the component.
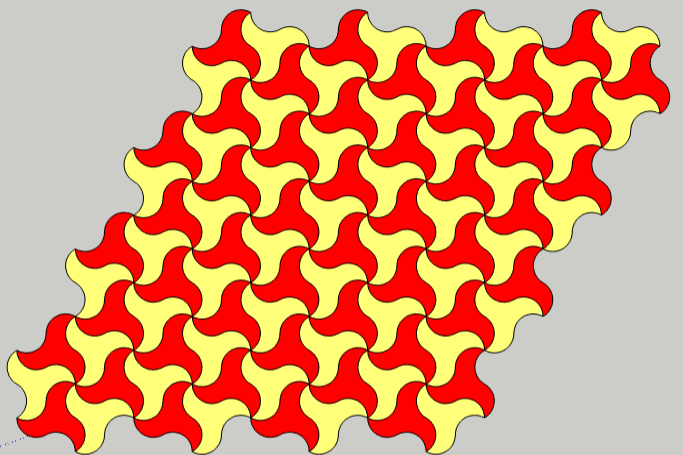
Here’s how the pattern looks if you use three colors:
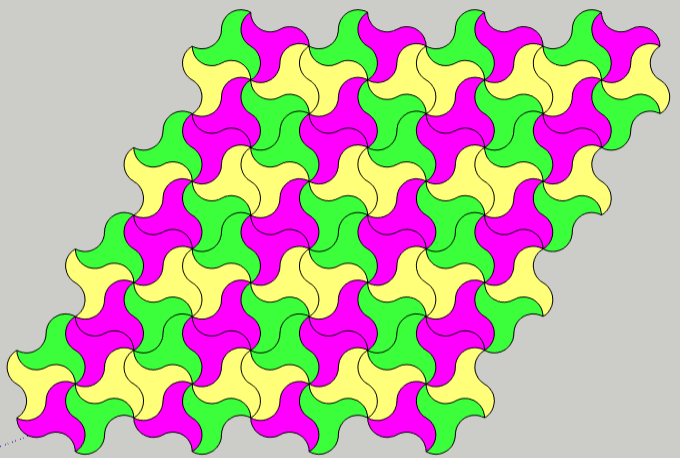
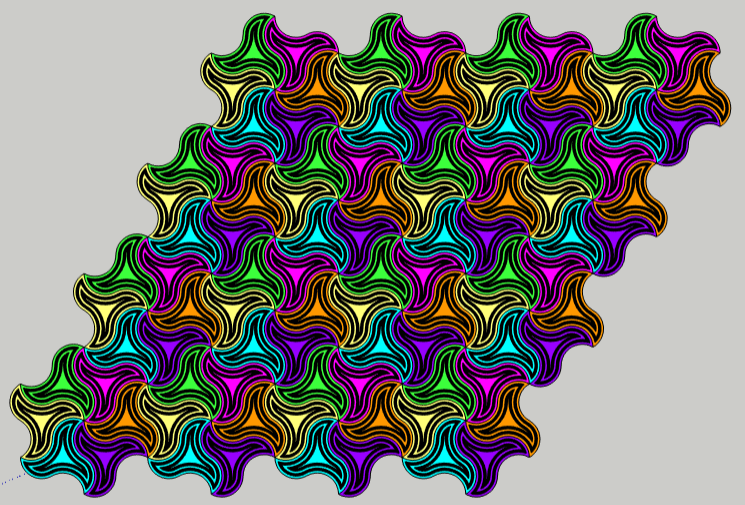
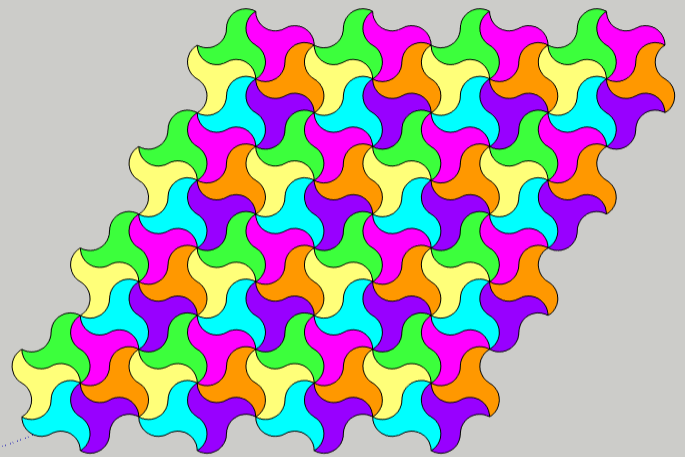
Or you could use six colors:
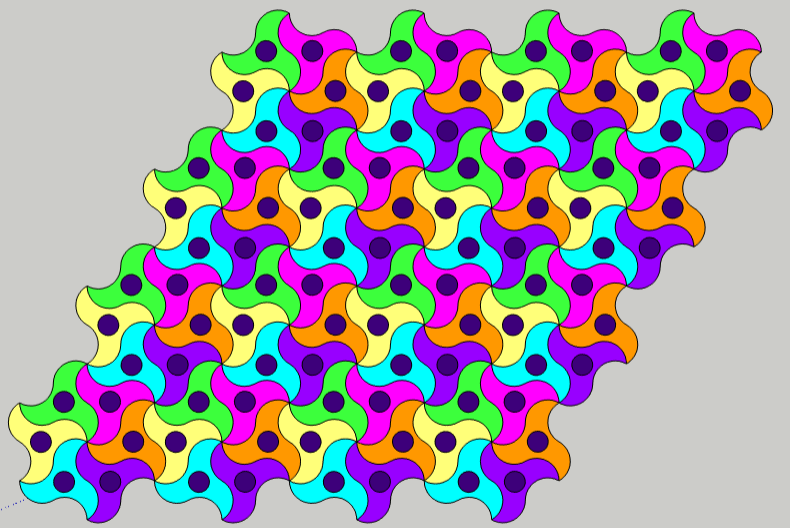
Because these are components, you can experiment with decorating the pattern. For example, you can add rotate-copied circles in the middle of each shape:
Or, if you can find the Offset tool (part of the Push/Pull flyout toolbar), you can add swirly stripes to each shape: