


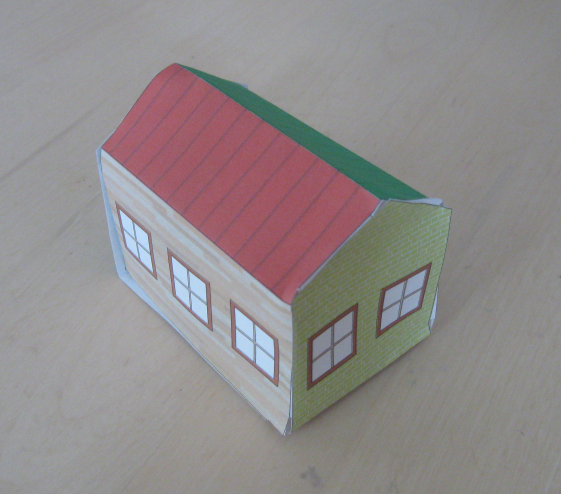
For this project, all you need is SketchUp, a printer, scissors, and tape or glue. You’ll start with a model of a house, which you’ll “unfold,” then print and cut, and finally, fold and assemble.
SketchUp is a free and fun web-based program for 3D modeling. You can use SketchUp to design just about anything, from furniture to a dream bedroom to an entire city. Go to here.
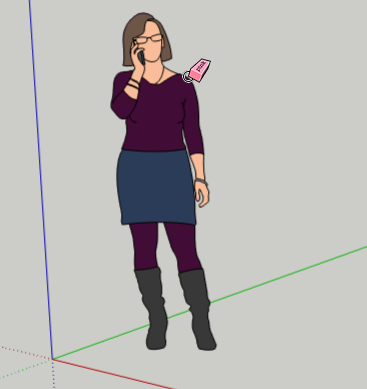
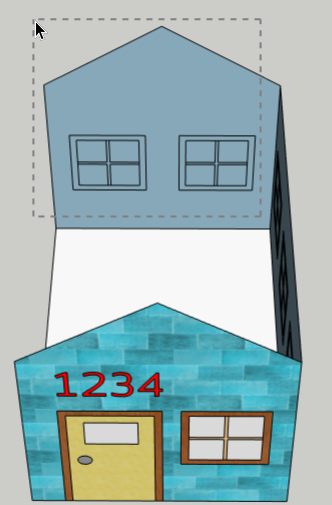
When you start modeling in SketchUp, you start in this view, with Helen standing on the ground. She isn’t needed in this model, so press E for the Eraser, and click on any of Helen’s edges.
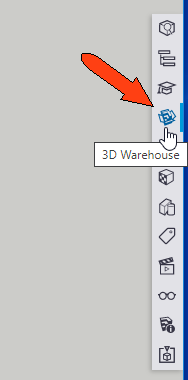
To find the starter model, go to the right side of the screen and click the 3D Warehouse icon.
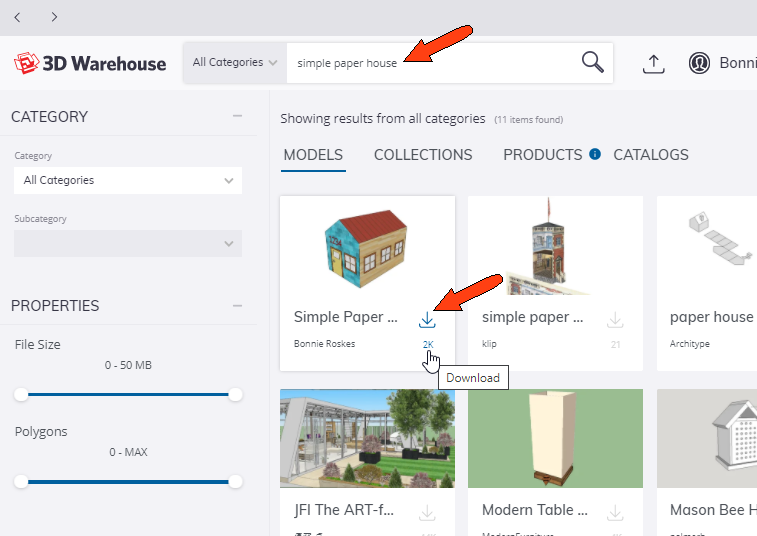
In the search bar, enter “simple paper house.” The model you want is by Bonnie Roskes, and should be the first one on the list. Click the Download icon.
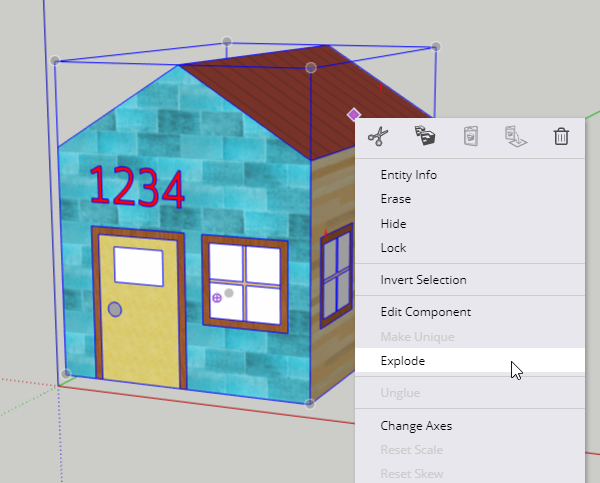
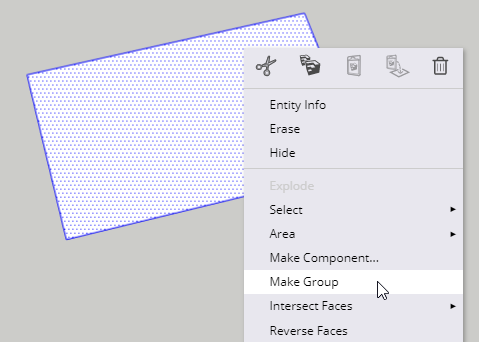
Click anywhere on or near the origin to bring in the house. Models from the 3D Warehouse are imported as components – a single object. But we need to “get inside” the component to start unfolding its faces. So right-click anywhere on the house and choose Explode.
To unfold properly, each face of this house must be made into a group, so that it won’t “stick” to its neighboring faces. We’ll start with the roof faces, since they don’t contain any windows or doors.
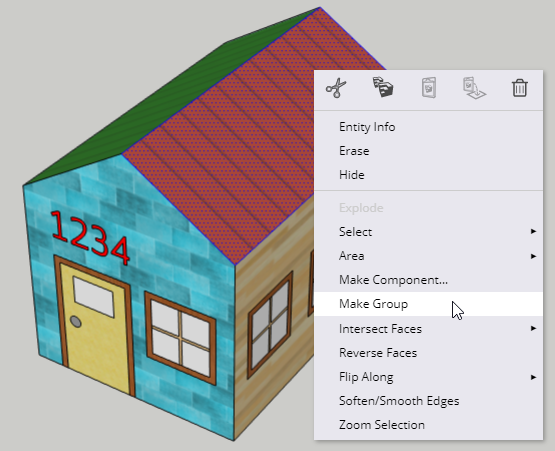
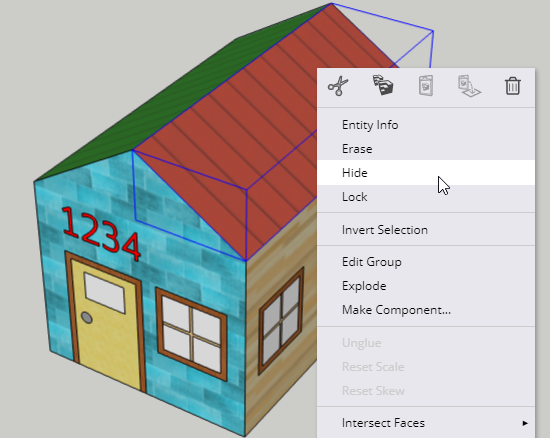
Press the Spacebar for the Select tool, and double-click the red roof face. This selects the face itself plus its surrounding edges. Then right-click on the selected face and choose Make Group.
A grouped face doesn’t look much different than a regular face. So in order to keep track of what still needs to be grouped, we’ll hide each group as it’s made. Right-click on the group you just made, and choose Hide.
Then do the same for the green roof face: double-click to select it, make it a group, then hide it. Now both faces of the roof are hidden.
Each of the four walls contains a door, or windows, or both. So you can’t just select and group a single face – you need to select everything contained in each wall. This requires a window-selection, which means dragging from corner to corner.
There are two types of selection windows: left-to-right and right-to-left. The difference: left-to-right selects everything that’s entirely inside the selection window. Right-to-left selects everything inside OR touching the selection window. It’s possible to use either type here, depending on how the model is oriented and where you drag the selection window.
An easy way to start is to spin the model so that you’re facing the inside of one of the walls. Then use a right-to-left selection window, as shown below, which includes or touches all doors or windows.
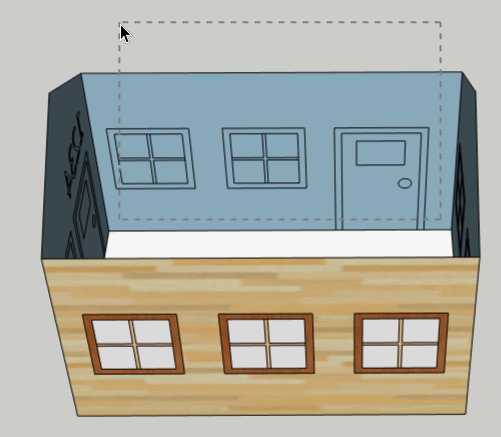
If you selected correctly, everything on that wall will be highlighted in blue.
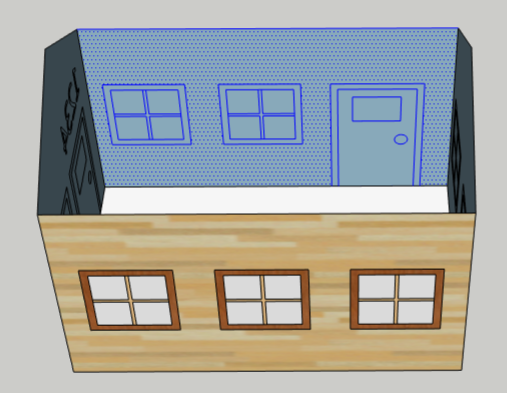
Right-click anywhere on this selected wall, group it, then hide it.

Then continue with the same steps for the other three walls: use a right-to-left selection window
… then group and hide.
When the four walls are grouped and hidden, you’ll be left with just the floor. Make a group of this face as well, but there’s no need to hide it.
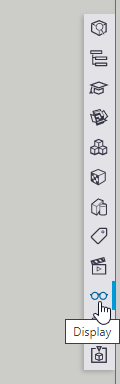
Now it’s time to bring everything back. From the icons along the right, click Display.
At the top of the Display window, under Unhide, click All.
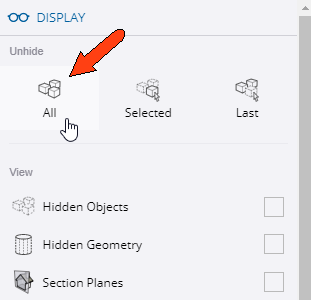
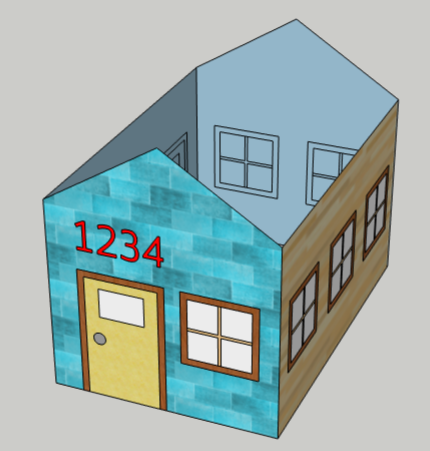
The entire house comes back, ready to be unfolded.
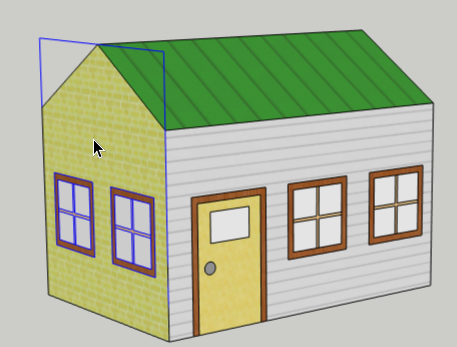
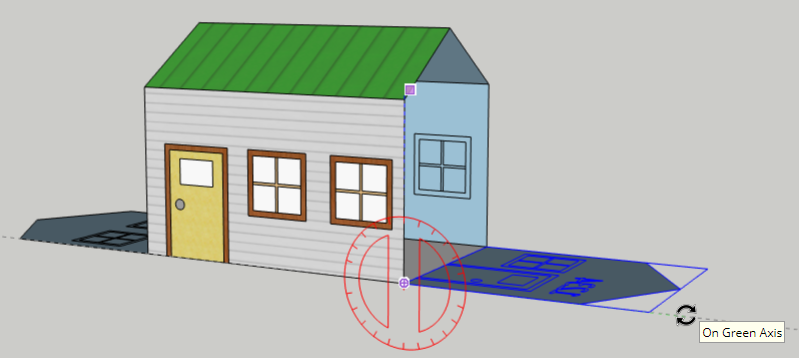
The Select tool should still be active – click to select the yellow wall.
Press Q to activate the Rotate tool. Then press the Right arrow (you don’t have to hold this key down) to orient the protractor to the red axis. Click the place the protractor at the lower right corner of the yellow wall.
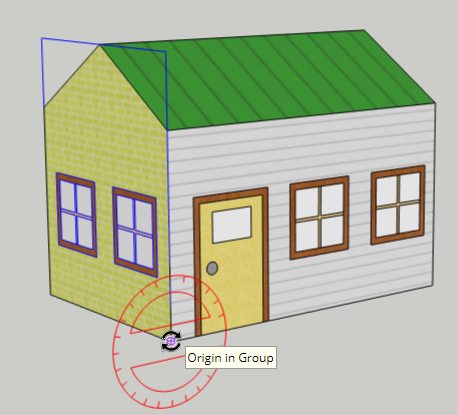
Unfolding this wall requires two more clicks while in the Rotate tool. The first click is at the top right corner of the wall. Then move the cursor down to unfold the wall down to the ground, away from the rest of the house. Click again when you see 90 in the Angle field at the lower right corner of the screen.
Repeat these steps for the blue wall: Select it, activate Rotate, make the protractor red, and click three times: lower corner, upper corner, ground.
We don’t want to leave any faces “hanging” in mid-air, so it’s important to keep faces attached when possible. So the rest of the unfolded faces will be rotated together. To select both walls and both roof faces, you can press Shift and click each group. Or you can use a right-to-left selection window.
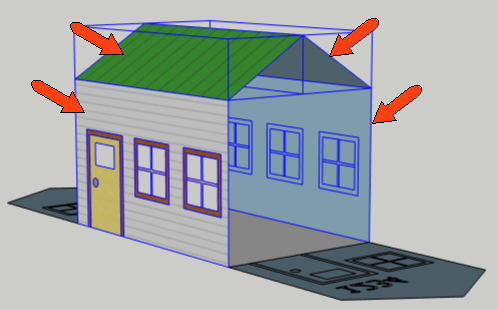
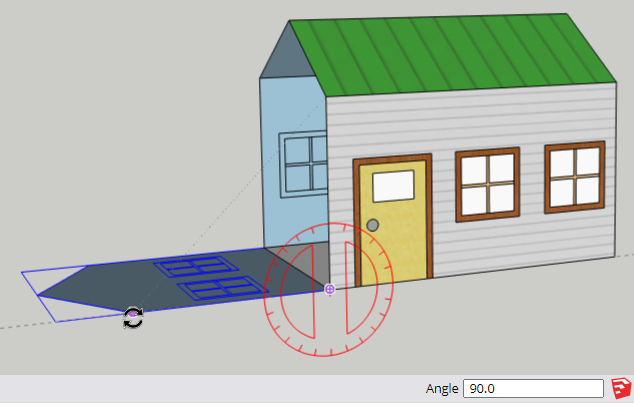
The gray wall will be unfolded first, then the rest of the groups will follow. Activate Rotate again, and this time press the Left arrow to turn the protractor green. Use the same three clicks to bring this wall to the ground.
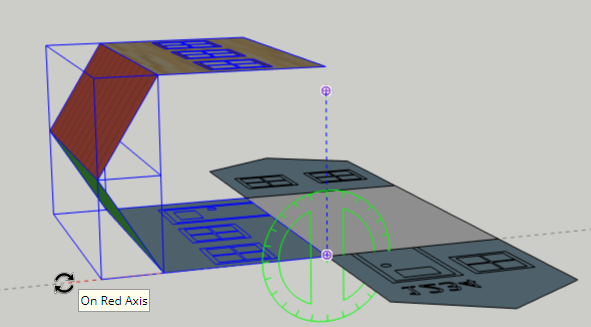
Now select the three remaining unfolded faces.
With the Rotate tool, oriented in green, click the first corner on the ground and the second corner at the top of the roof.
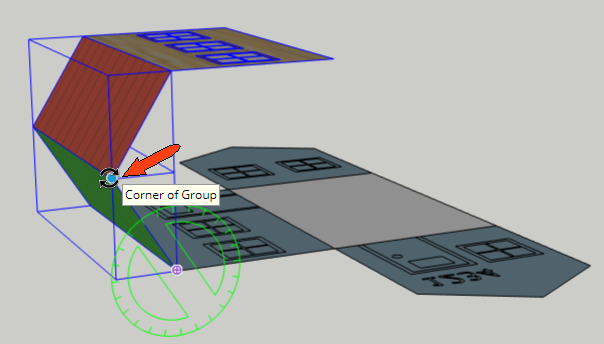
The rotation angle isn’t 90 degrees this time, because the roof is not at a right angle. So for the third click, which completes the rotation, look for the “On Axis” popup. The angle should be around 58 degrees.
Keep going with the remaining two faces, until everything is nice and flat.
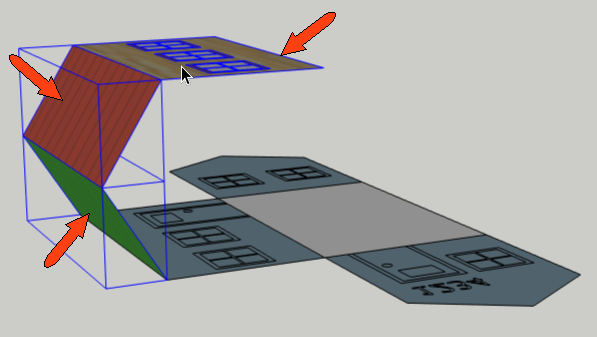
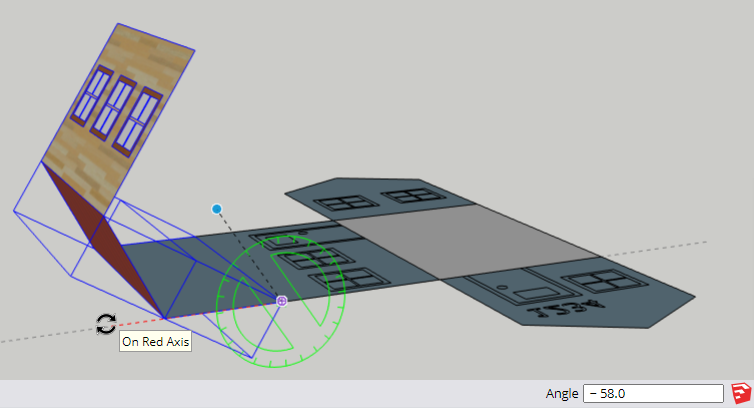
We’re looking at the inside of these groups, not the painted front sides. So to turn the whole thing upside down, select everything and activate Rotate one last time. Use either the green or red orientation, and rotate the faces 180 degrees.
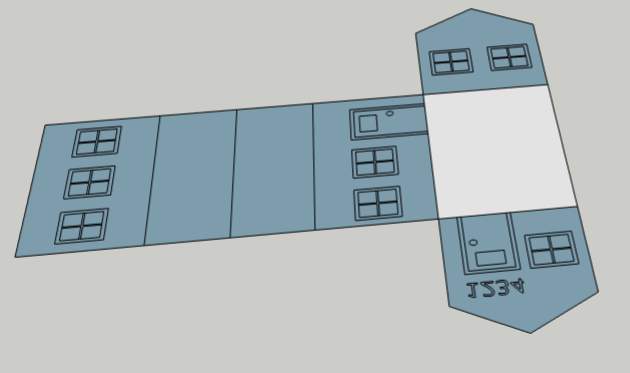
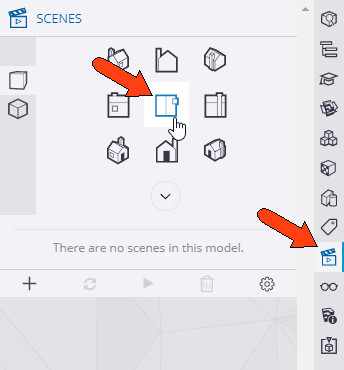
To get a bird’s eye view of the unfolded house, open the Scenes window and click the Plan View icon.
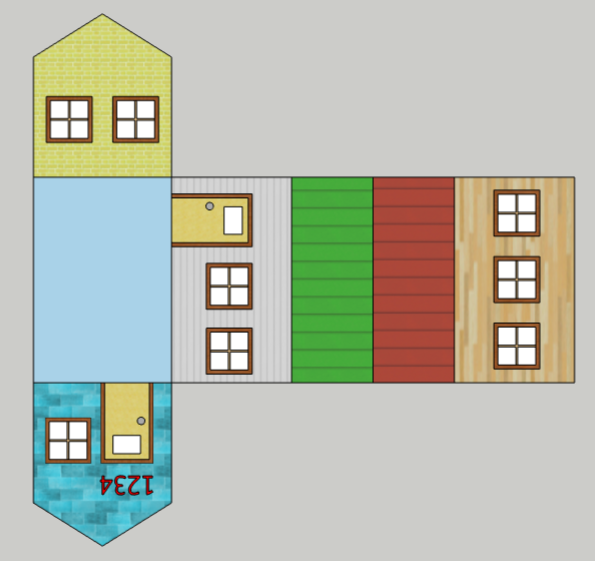
This is just one of many ways to unfold this house. You also could have walls next to all four sides of the floor, and the roof faces could be attached to different walls.
The next steps will be familiar if you’ve ever put together paper dolls: folding tabs. Without these, assembly is pretty difficult. To add tabs, press R for the Rectangle tool.
Figuring out where to place tabs requires some 3D thinking. But in this case it’s pretty easy: tabs will be placed along the four faces on the right side. Start the first rectangle where shown below:
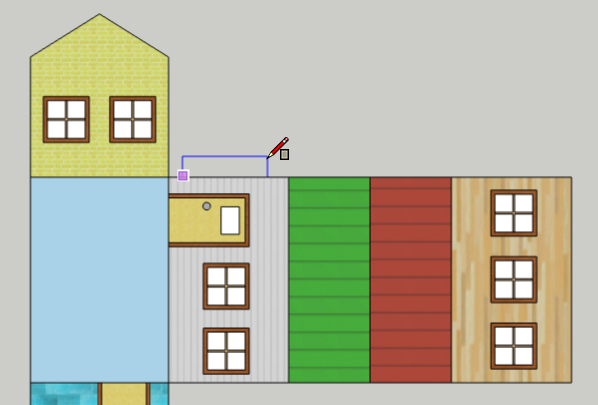
Finish your tabs so that they go all the way around the four faces on the right side.
Now we’re ready to print! Click the three-line icon at the very top left corner of the screen, and choose Print.

In the Print Preview window, you can zoom to increase the model size relative to the paper. There’s also an option to print with a white background.
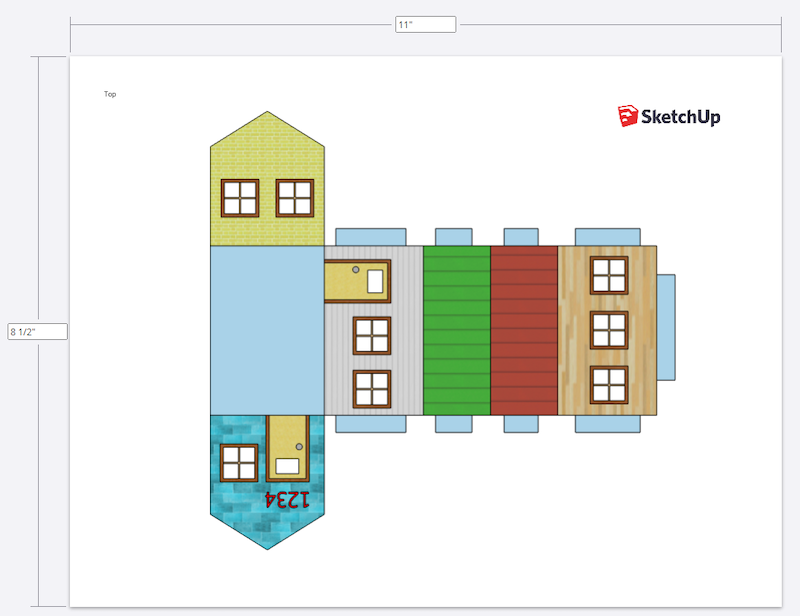
Click Print to PDF at the lower right corner. The PDF will be sent to your Download folder, where you can find it and print.
With a steady hand, cut around the faces and fold tabs. (If you’re very handy with scissors, or have a craft knife, you can also cut around three edges of each door and window, so that they can swing open and closed.)
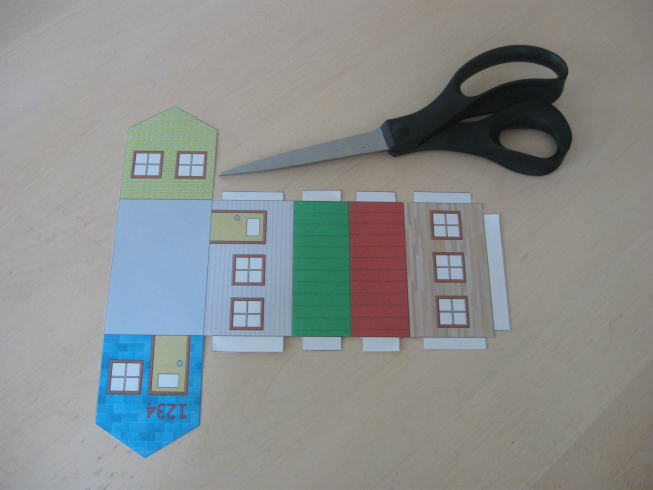
Fold each tab and wall. It’s also very helpful to cut a hole in the floor, large enough to fit a few fingers, so that you can reach in and work with the fold tabs from the inside.
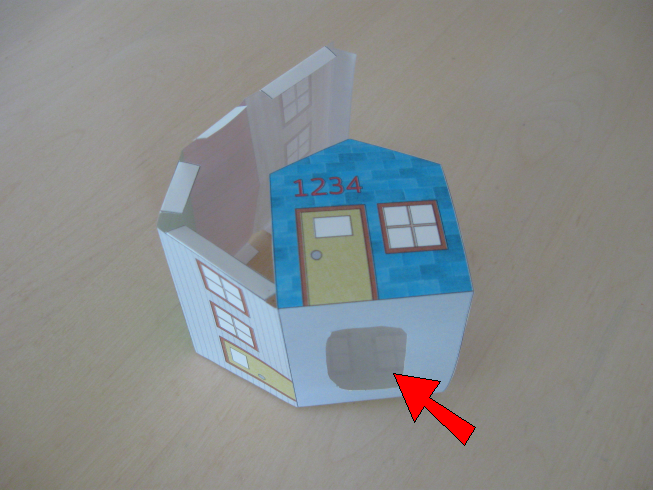
Assemble using a few drops of glue on each tab, or with tape.
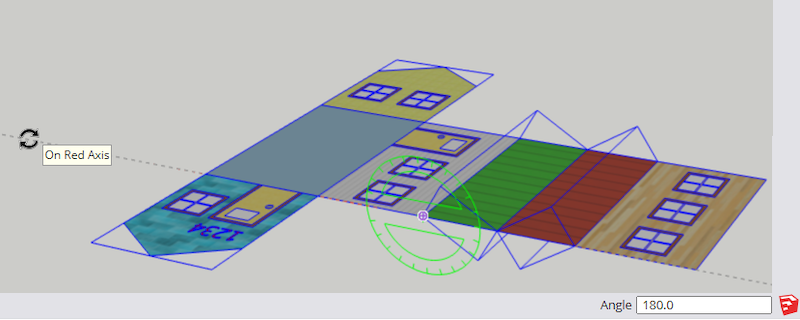
Once you understand the grouping and unfolding technique, you can apply it to more complex models. If you want to try a harder project, search the 3D Warehouse for ”3DVinci Complex Paper House.”

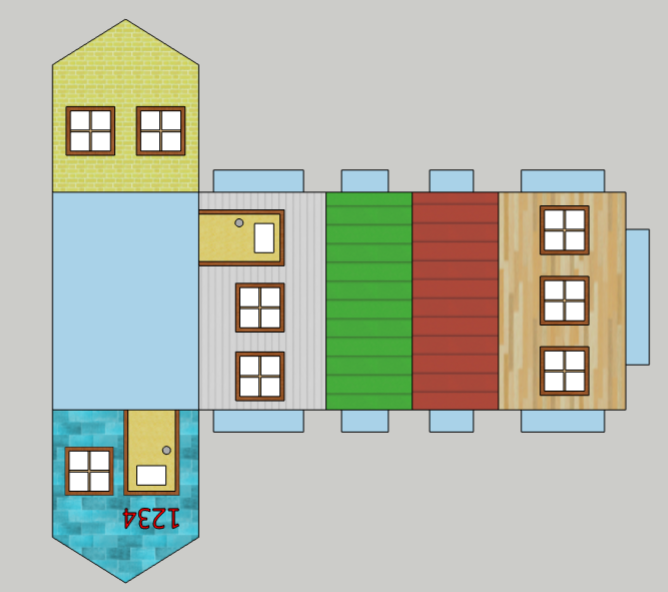
For a model like this, once you’ve grouped each face and wall, the trick is deciding how to unfold it. For example, look at the wood and brick walls – they’ll overlap unless you make sure to keep them apart. Here’s one of many ways to unfold this house:
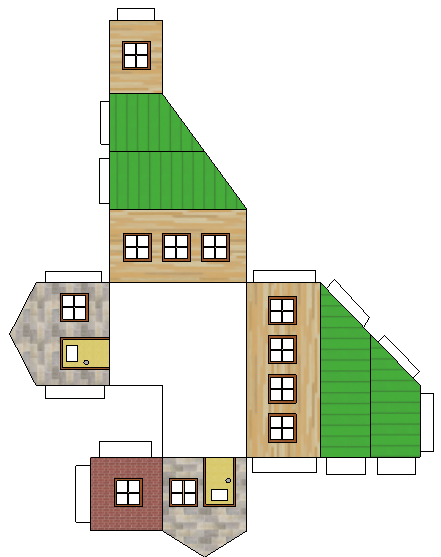
To create fold tabs along diagonal edges, you can use the Line tool (shortcut: L) instead of Rectangle. It’s actually quite tricky to figure out where the tabs go – you need to be able to
identify each wall’s adjacent walls, and avoid creating “double” tabs. Not as easy as it looks!
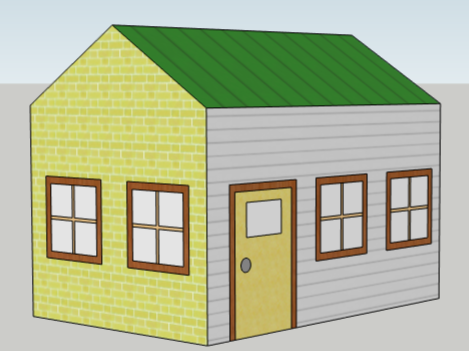
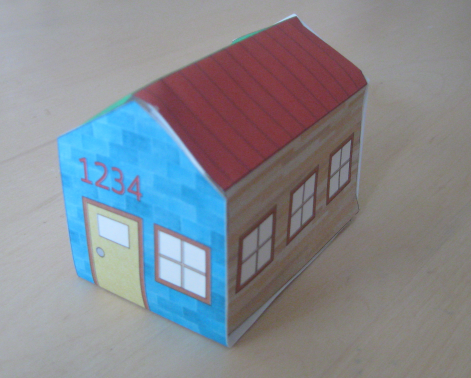
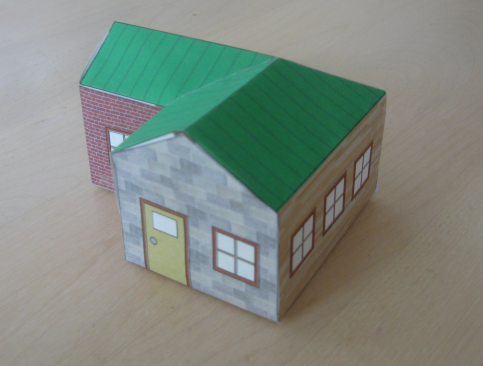
Here’s the assembled version of this house:
Learn More
Build a Paper House
https://www.youtube.com/watch?v=34AZCGIXToA
Rainbow House
https://www.youtube.com/watch?v=DsGJ9i1CB8o
Teaching 3D with Sketchup
http://www.3dvinci.net/forteachersmodelmetricks.htm
How to make a house
https://www.instructables.com/id/Sketchup-How-to-Make-a-House/