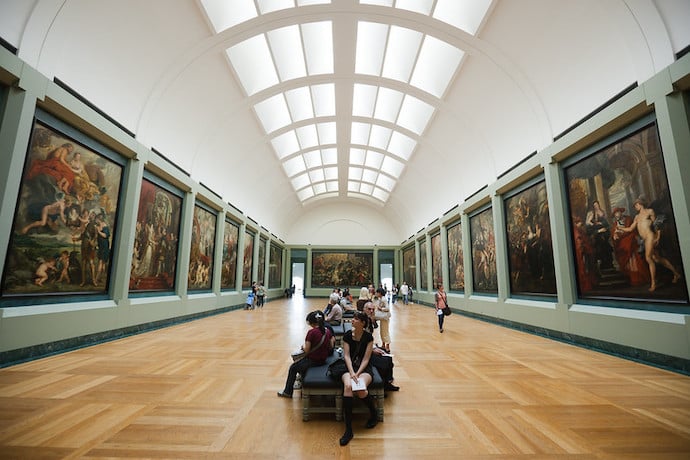
In this project, we’ll design a two-room art museum in SketchUp. This is Part 1, and in the next issue, Part 2 will be creating a tour of your museum.
All you need for this project is SketchUp in your internet browser. SketchUp is a free and fun web-based program for 3D modeling. You can use SketchUp to design just about anything, from furniture to a dream bedroom to an entire city. Go to https://app.sketchup.com/app.
When you start modeling in SketchUp, you start in this view, with Helen standing on the ground. She isn’t needed in this model, so press E for the Eraser, and click on any of Helen’s edges.

Press the R key for the Rectangle tool. For the first room, click anywhere on the ground to start, and move your mouse toward the other corner. Pay attention to the measurements in the Dimensions field, in the lower right corner. A museum room should be pretty large: 20 or 30 feet (or the equivalent metric units) on each side. When your room has the size you want, click again to finish the rectangle.

In my example, the museum will have two rooms, but you can create any floor plan you’d like. Create another room to one side, and add a rectangle in between, for a hallway.

Press E for the Eraser, and erase any edges that separate rooms. You should be left with one unbroken shape.

Walls have thickness, so we want to create another set of edges for the inner walls. This is done with the Offset tool, which you can find inside the Push/Pull flyout toolbar, on the left side.

Click once inside the floor shape, and move the mouse just inside or outside the room. The Distance field displays the offset value, which should be a few inches or cm. Click again to finish.

To pull up the walls, press P for the Push/Pull tool. Place the cursor in any part of the thin face that represents the walls.

Click to start pulling, move the mouse up, look for a distance of 11 or 12 feet, and click again to finish.

The museum will need at least one doorway. So press R again, and draw an opening within one of the walls.

Press P again for Push/Pull, click the door rectangle, and push the door rectangle inward. You won’t be able to go past the wall thickness, and when you click again, the hole will be pushed through.

The walls and floor are finished (unless you want to color them).
To prevent anything we’re about to add from “sticking” to the walls, the whole room will be made into a group. Press the Spacebar for the Select tool, and draw a selection window around the entire room.

Right-click on any selected face, and choose Make Group.

The room is now highlighted in blue, and is grouped into one object. You can right-click in blank space to unselect it.

The next step is to find images of the art you want to place on the walls. In my example, I’m using a variety of famous paintings. But you can stick with one artist, or one art period or region, or even use your own art if you have scanned images. Or you can create a photo gallery instead, using your own photos or photos you find online.
As an example, if you want to find an image of the most famous painting in the world, the Mona Lisa, do a Google Search and click Images.

Click any image to open the website where the image is located. For the image you want to use, right-click on it and use the saving option provided by your browser. Note that some images can’t be saved, such as images on official museum websites.

Save each image to a location you’ll remember on your computer.
Back in SketchUp, click the three-line icon at the very top left corner, and choose Insert.

Choose the “Your computer” option.

Browse to where you saved your image and click Open.

And finally, choose the Image option. (The Material option is used when you’re painting a face with a texture.)

The image is attached to your cursor. Click to place the lower left corner on the wall where you want this painting to hang, then move the mouse to get the size you want, and click again to finish.

If you like the no-frame look, you can leave each image as is. That look could work nicely for a photo gallery or a display of modern art. If you want to add frames to your paintings, though, each image must be made into a regular SketchUp rectangle. To do this, right-click on the image and choose Explode.

Once your image is exploded, you’ll probably see some “shimmering” effects while you change the view. This is because the flat image rectangle lies in the same exact plane as the museum wall, and SketchUp doesn’t know which face to display on top. But we’ll fix this later, by making the painting and its frame 3D.
Find the Offset tool again, and create a frame rectangle outside the image.

To paint the frame, open the Materials window by clicking the icon along the right side. Use the magnifying glass icon to open the list of material categories, and open Colors or one of the other categories like Metal or Wood.

Click the color or texture you want to use, and click the frame to paint it.

Use Push/Pull to first pull out the frame a few inches from the wall . . .

. . . then use the same tool to pull out the painting itself. Now it’s clear which faces go where, and there should be no more shimmering.

In a real museum, everything is labelled: the painting name, artist, year, media, or other details. To add your own labels, open the Rectangle flyout on the left and activate the 3D Text tool.

In the Create 3D Text window, set the letter height to something realistic, such as 3”. Keep text filled, but also keep it flat – not extruded. Then in the text box, type what you want to say. Unfortunately, there are no alignment options, so if you want your text centered, you’ll have to do it by adding spaces.

Click OK, then click to place the text below or to the side of the painting.

3D Text is grouped, so you can paint it with one click.

If you want to move paintings around, it’s easier if the painting and its label are one group. So press the Spacebar again for the Select tool, and drag a window around both.

Make these objects into a group. Now you can use the Move tool (shortcut: M) to move the whole thing.

Now that you know how to create paintings, frames, and text in SketchUp, have fun filling the rest of your walls. In my example, I looked for famous paintings by Monet, Magritte, Van Gogh, and more.


And, as mentioned at the beginning, stay tuned for Part 2 of this project. You’ll learn how to use SketchUp’s camera tools and scenes, to create a guided tour of your museum.
Learn More
Interactive virtual art exhibition
https://blog.sketchup.com/article/using-sketchup-to-create-an-interactive-virtual-art-exhibition
Building a museum
https://www.youtube.com/watch?v=7k4tN-kozT8
Sketchup art project
http://www.3dvinci.net/teacherguide/SketchUpArtProject_6-9.pdf
Mona Lisa
http://www.3dvinci.net/teacherguide/SketchUpArtProject_6-9.pdf


