


FOR THIS PROJECT YOU WILL NEED
- A computer running Windows, macOS or Linux
- An account on the Scratch website
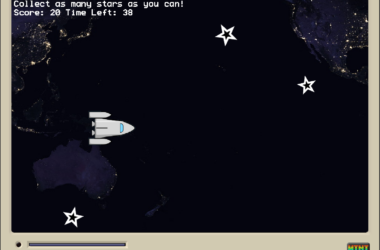
Scratch 3.0 is an awesome way to introduce coding and with the recent anniversary of mankind landing on the moon, I thought it would be fun to create a quick game to test our space knowledge and learn more about how easy Scratch is to use. The player is asked three questions and each time they are correct their rocketship will move nearer to a new planet! Answer all of the questions correctly and you win the game.
If you would like to play the game then you can! Visit https://scratch.mit.edu/projects/330419915/ to play the game, and click on “See Inside” to view the code that makes the game possible.
In this project we will learn
- How to write a game using Scratch 3.
- How to ask questions.
- How the answer to a question can affect the game.
- How to move and change the size of sprites.
- How to play sound.
Getting Started
In a web browser, go to https://scratch.mit.edu and click on Create to start a new project.
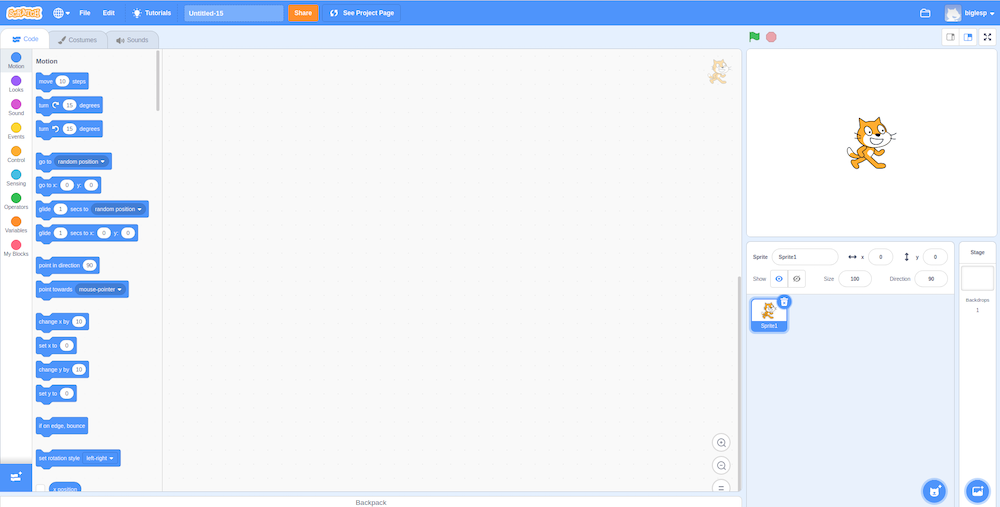
The Scratch interface has three main columns. From left to right we have the blocks used to write code. These are in color coded categories. Blocks are dragged from here to the center column, this is where we write the code. In the right column we have the stage, this is where all of the game / project is run and where we can interact with it. Under here is where our sprites are stored, sprites are the characters in our game.

The first step in the game is to change the background of the stage so that is it more space related. To do this, click on the “Choose Backdrop” button and then select an appropriate background for the game.
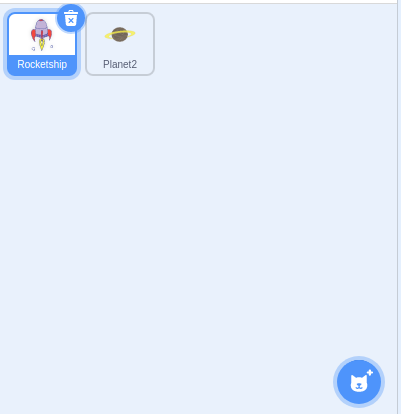
We need to delete the cat sprite, and to do this we simply need to click on the Trashcan icon in the sprite box. Then click on the “Choose A Sprite” button and select two sprites. The first is the Rocketship, our avatar in the game. The second is Planet2, which is the goal of the game. Move the Rocketship sprite to the bottom left of the screen, and the planet to the top right.
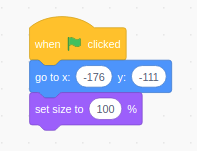
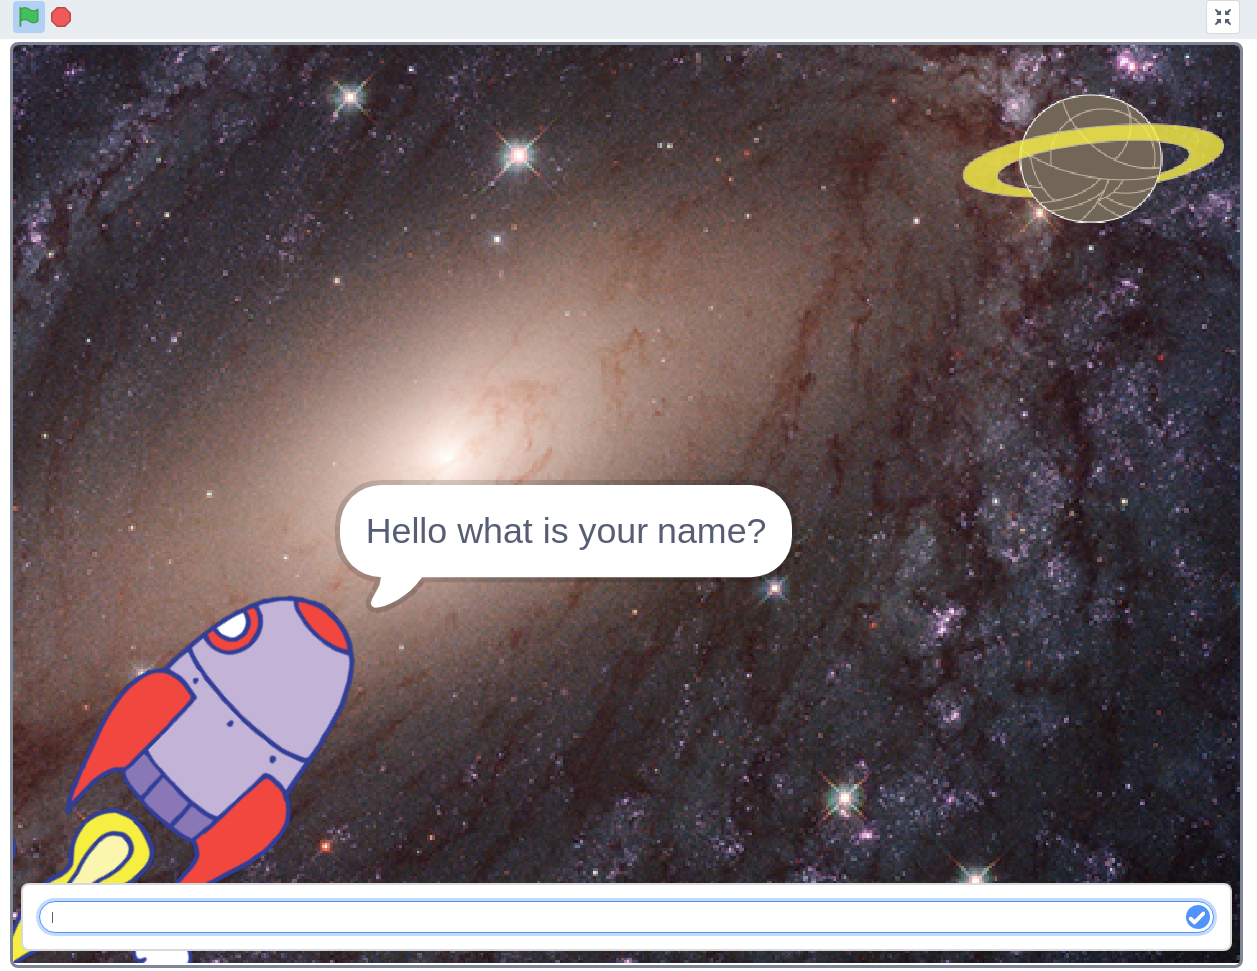
We start the code for this project by first clicking on the Rockstship sprite as the code we shall write is for that sprite. Then we go to the Events section and drag the “When Green Flag Clicked” block to the coding area. Then we go to Motion and drag the “go to x: y: “ block and place this under the previous block. The x and y values will be for the current position of the Rocketship. Next we go to Looks and drag “set size to 100%” into the coding area. This will reset the size of the sprite each time the game starts.
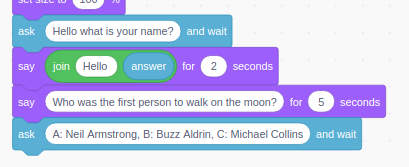
Continuing the code and from Sensing we now use the “ask ___ and wait” block. This block is used to ask questions, and the first question is to ask for the players name. Then we go to Looks and drag “say hello for 2 seconds” and place this into the code. To say hello to the player by name, we need to use a “join” block from Operators.
We change the first word from apple to “Hello “ (with a space at the end) and for the second space we go to Sensing and drag the “answer” block. This now triggers the game to start and using another “Say ___ for 2 seconds block” from Looks we now ask a question that will be on screen for 5 seconds. Then using another “ask __ and wait” block from Sensing we give the player three options, labelled A,B,C and the player will use those letters to answer the question.
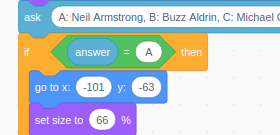
With the question asked we need to check that answer so that the player can progress. So we go to Control and use “If .. then .. else” and then go to Operators and drag “__ = __” into the space inside the if block. Then go back to Sensing and drag the “answer” block into the first blank space, and for the second we add the letter for the correct answer, in this case A.
So what happens if the answer is correct? Firstly we need to move the Rocketship sprite nearer to the planet. So on the stage move the sprite nearer to the planet. Then go to Motion and drag the now updated “go to x: y:” block into the code. Then go to Looks and drag the “set size” block into the code and change the value to “66” this will cause the rocket to shrink as if it is flying away from us.
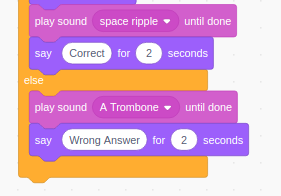
Carrying on the code for a correct question, we can play a sound to reward the player. Click on the Sounds tab, found in the top left of the screen. Click on the “Choose a sound” button and select a sound. When done click on Code and then click on the Sound code blocks. Drag “play sound ___ until done” and make sure that the drop down option shows the sound that you wish to play. The last piece of code for a correct answer is to use “say ___ for 2 seconds” from Looks to tell the player that they are correct.
But what happens if the player is wrong? Well then a sad trombone sound will play, then the sprite will say that their answer is wrong. The player does not move forward.
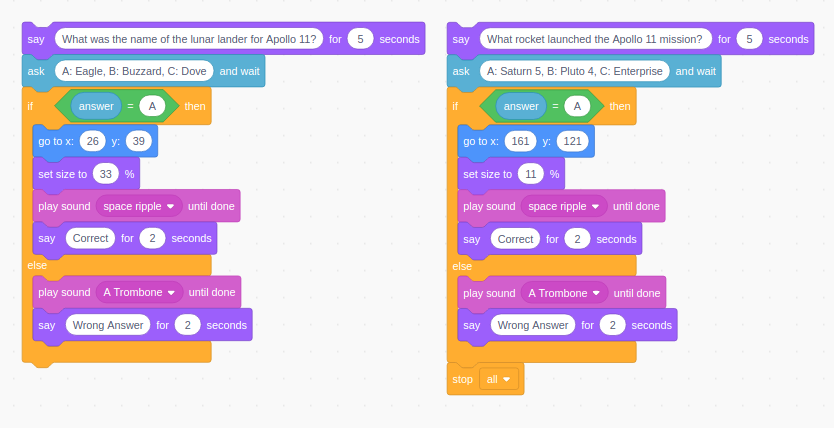
For the next two questions we follow the exact same process, asking a question, checking the answer and if correct moving the Rocketship nearer to the planet, shrinking the size of the Rocketship so that it looks like it will land. Remember that the code needs to be all linked together in order for it to run after asking each question. The only difference with this code is that after the final question is asked we need to stop the game and to do this we use “stop all” found in the Control blocks. This will stop all the code at the end of the game.
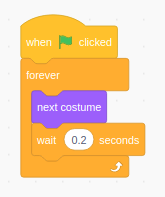
This next section of code is an entirely new sequence and it controls an animation built in to the Rockstship sprite. Using “When Green Flag Clicked” from Events and a “Forever” loop from Control we use the “next costume” block from Looks to change the costume of the sprite which will give the impression of animation. sprites can have alternate costumes that are used to change the look of a sprite. In order to see the change we need to use a “wait 1 seconds” block from Control and change the 1 to 0.2.
In our final section of code we will add some music to the game. For this click on the Stage, found in the bottom right of the screen. The coding area will clear, but don’t worry your code is not lost.
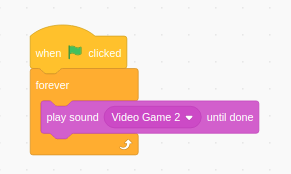
The code to play music is something that we have already done. We play a sound until done. All we need to do is select the music that we wish to use from the Sounds tab and then drag the appropriate blocks from the coding area.
With the game now complete, click on the Green Flag just above the stage and get ready to blast off to strange new worlds!
So what have we learnt?
- How to use Scratch 3 to write a game.
- How to move sprites to exact positions.
- How to ask a question and store the answer.
- How to check if the answer is correct.
- How to play background music and sounds that react to the players progress.
Learn More
Creating a racing game in stratch
https://www.youtube.com/watch?v=mIAzYvOns04
Two-player racing game
https://en.scratch-wiki.info/wiki/How_to_Make_a_Two-Player_Racing_Game
Motion, looks, sound in scratch
https://code.tutsplus.com/tutorials/working-with-motion-looks-and-sound-in-scratch–cms-24224