
A Raspberry Pi is a hand-sized computer you can use to do all sorts of projects. Plus you can buy colorful cases, even build a case from Legos. This article starts with a video I watched that finally inspired me to buy a Pi and figure out what makes it so fun and interesting. Followed by lots of details about how to get started with your own Raspberry Pi projects.
To begin, here's an amazing video to demonstrate the power of Sonic Pi, software for the Raspberry Pi to let anyone, especially little kids ages 5-8, learn a few programming basics AND make music:
What's a Pi, or Raspberry Pi, or whatever it is called? I didn't know until this past summer when my son and I built a computer from scratch for an article in this magazine. A magazine we consulted for that project had an article about Pi, a small credit-card sized computer board with all kinds of connectors. But Pi sounded mysterious and way too technical.
This article describes what a Raspberry Pi is (not food, sorry) for those who don't know, how to set one up, how to download Sonic Pi, and how to use it to make music. You should be able to print out this article, buy anything you don't already have, and have some fun. And, if you have a working Pi and want to get to the Sonic Pi bits, feel free to jump to that section towards the middle and end of this article.
Please note: all links are at the bottom of this article, the same for every article in this magazine. It's less distraction (you don't have to click as you read) and makes it easier to print out or use Pocket or similar app to use the links later.
What is Raspberry Pi?
Raspberry Pi is one of several open source hardware projects whose purpose is to encourage people to learn hands on about computer hardware and software. Projects like Pi offer a computer on a small hand-sized board along with all kinds of add-ons plus active communities of users. The communities around these projects write up articles, posts, videos, and other media to document how to create projects.
Got raccoons in your back yard? Likely there is a solar or battery-powered computer board solution to hook up a motion-sensitive camera. Want to turn on your lamp or TV with voice commands? That's possible, too. These computer boards can also be used to power standalone kiosks in stores and malls. You can even use your Pi to tweet or text you if you leave your garage door open. The possibilities are limitless.
Raspberry Pi also achieves several socially useful goals beyond making it easy and cheap for anyone to play with computer hardware. The boards are built in the UK, creating jobs in their country. And the organization works with UK schools as part of a new computer science curriculum for students of all ages.
There are three big open source hardware projects you can explore:
- Arduino boards do not have an operating system (it's in the microprocessor chip) and many of the projects involve pins and wires. Some elements, for example, microphones, are attached to additional boards called bread boards. This makes Arduinos very hands on, great for craft and other more artistic projects.
- Raspberry Pi boards work more like a traditional computer with a version of the Linux operating system and other features. The boards are also more powerful, at the moment, than Arduino boards. Projects can be done with any software language that runs under Linux (Python is the usual choice), as well as with pins and wires. Pi boards do work with additional boards called shields.
- BeagleBone boards are sponsored by Texas Instruments, in Austin, Texas, and the chip maker. They also use versions of Linux and include lots of computing power. Projects can be done with any software language that runs under Linux (Python is the usual choice), as well as with pins and wires. Beagle boards also work with additional boards called capes.
Bottomline, Raspberry Pi, BeagleBone, Arduino, and other open source hardware projects are fun. They're also challenging. And for a small amount of money, less than $200 USD in almost all cases, less than $100 USD in many cases, you can play with computer hardware and software to learn how computers really work.
While this article is about Raspberry Pi, links to the other two projects, Arduino and Beagle Bone, are at the bottom of this article.
How to Buy a Raspberry Pi
To write this article, I drove half an hour to our local MicroCenter store with my teenage kids because I saw MicroCenter sells Pi boards, accessories, and books. Once there, however, I learned none of the sales staff knew anything about what to buy to make Raspberry Pi work. So, instead of buying, having collected most of what I thought was needed, I put back on the shelves the cabling, Pi board, and other materials. I only bought a how-to guide and that has proven useful yet deadly, as you'll see.
Back at my desk, I went to RaspberryPi.org and clicked around. I found the Quick Start guide with a list of must haves. I also found Adafruit.com who not only sell Pi boards and parts, they also have lots of tutorials. It was easy to discover what I needed to buy to build a Raspberry Pi and run Sonic Pi. I had my gear in two days.
In addition to the Raspberry Pi parts, you'll also need a computer monitor or TV with DVI or HDMI connectors, as well as a keyboard and mouse with USB connectors. The preferred monitor connection is an HDMI connection and USB is preferred for keyboard and mouse. However, there are HDMI (on the Pi) to DVI (on a monitor or TV) cables and USB to PS/2 connectors available; it's simply an extra step or two to find these additional connection types.
It also might help to find and use a small shoe box-sized container to hold your Pi and any cables and other parts. Makes it easier to find things over time. And you should consider a power strip: the two power plugs I used cover two plugs instead of covering one plug on my power strip. You might have to move plugs around for everything to be cozy.
Here's what I bought:
| Item | Price (USD) | Required? |
|---|---|---|
| Raspberry Pi Model B | $39.95 | Y |
| 5V 1A USB port power supply | $5.95 | Y |
| USB to Micro USB Power Cable | $3.95 | Y |
| USB 2.0 Powered Hub (7 ports) | $21.95 | Y |
| SD/MicroSD Card (4GB SDHC) | $7.95 | Y |
| HDMI to HDMI Cable | $4.95 | Y |
| Enclosure for Raspberry Pi (Timber Pibow) | $19.95 | Y |
| Miniature WiFi Module (802.1 b/g/n) | $11.95 | Y/N |
| Dynex USB Keyboard/Mouse | $19.95 | Y |
| Totals | $136.55 |
At MicroCenter, I did find and buy a small book, Getting Started with Raspberry Pi by Matt Richardson and Shawn Wallace, which is brilliant (and linked below). It not only describes how to get started but also how to use the Python programming language to do things with Pi. You can sit down and bang out commands to learn and see what works. Surely there are other, equally useful books to get started with Pi.
One interesting note, however, about the Getting Started book. They describe a method to download an operating system to an SD card which works but is more technical and requires more software and time than the NOOBS approach described below and on the RaspberryPi.org site. I recommend buying an SD card with an operating system pre-installed or following the NOOBS method documented below and on the Raspberry Pi site.
Through Adafruit, I also bought a book, Programming the Raspberry Pi: Getting Started with Python, by Simon Monk, if you're interested in more detail about using Python in the Pi computer environment.
How to Get Started with Raspberry Pi
My Pi and its add-ons arrived conveniently on a Friday afternoon, plenty of time over a weekend to hack.
Getting started had two distinct phases. The initial setup phase took me a long time and required a number of steps and blind alleys. However, once a Pi is set up, the second phase of doing projects should always be much easier and more fun. This article describes a simple process distilled from my more bumbling chaotic process.
Here are the steps I took to get my Pi started up:
- Put my Pi board in an enclosure case.
- Create an SD card with the operating system (OS).
- Hook up all the cables to my Pi.
- Install the OS on my Pi
- Update the OS software.
- Download Sonic Pi
If you're a teacher working with Pi boards already configured, some of these steps do not apply. Your students will need to cable up then power up the board and connect to a TV or monitor but likely they won't need to get the operating system or update software. However, the first few steps in starting up a Pi should be testing your internet connection and updating any software (Step 5 below).
In addition, this article describes how to configure your Pi to work with your wifi, as well as allow remote access.
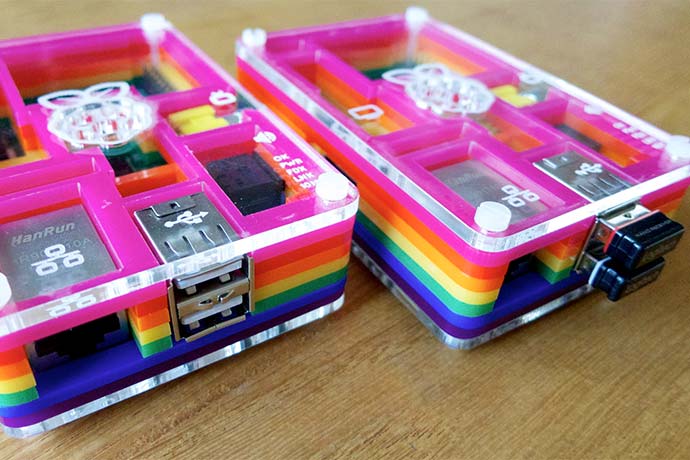
1. Put Your Pi in an Enclosure Case
While a case to hold your Raspberry Pi is not required, it does help protect your computer board and makes it easier to connect cables to the board. Your Pi will lay flat more often than without a case. More importantly, the internal paper-thin chip and wiring layers of your board will not risk piercing, water, or other damage that requires buying a replacement board.
Happily, there are a number of low cost options, from clear cases to wood to Legos. Pibow makes a number of cases sold through Adafruit and elsewhere. Note that some of these cases require you to build the case layer by layer, starting with the bottom then adding different layers to build the case around the ports on your computer board.
Keep track of the order your case layers are received and whether or not the top and bottom layers are right side up. In addition, while my wood Pibow frame layers cracked, I was still able to get a useful frame. Plastic frame layers likely are more durable. And Legos definitely work fine.
Cases are a fun way to personalize working with your Pi board, in addition to the protection they provide.
2. Getting the Operating System (OS) on an SD card
There are at least three ways to get an operating system on your Raspberry Pi:
- Buy an SD card with an operating system already on the card. This is the easiest and perhaps ideal option. If you're new to Pi, definitely try to go this route.
- Copy the operating system from RaspberryPi.org as a NOOBS zip file, extract the files into a folder, then download software to format your SD drive. Finally, copy the folder contents to a formatted SD drive. This option is straightforward and only takes time.
- Copy a specific operating system to your computer as a zip file, extract the operating system as an image file, then use Win32imager software to move the image file to your SD card. This option is the most complicated as it could involve setting up a BitTorrent software client to reduce download times.
For this article, I took the second route:
- Download the NOOBS (New Out Of Box Software) zip file from RaspberryPi.org.
- Extracted the NOOBS zip file contents to a new dedicated folder.
- Download the SDFormatter software from SDCard.org then format my SD drive.
- Copy the contents of the NOOBS folder from my computer to the newly formatted SD drive.
3. Hooking Up Cables
After adding a case for your Pi board, and a copy of the operating system on an SD disk, the next step is to cable up your board. Note that power is the last cable to connect because your Pi will boot up automatically when power is connected; if you connect your keyboard and mouse after power is connected, it’s possible your Pi won’t recognize the devices and they won’t be available for use.
Connect your Pi in this order:
- Press the SD card into the Pi slot for an SD card.
- Connect HDMI to HDMI (or HDMI to DVI) cable to a computer monitor or TV.
- Connect WiFi USB stub to one of the two USB slots on the Pi.
- Connect the USB hub to the second of two USB slots on the Pi. Plug in the power source to the USB hub and ensure it is on.
- Connect the USB keyboard and USB mouse to the USB hub. Alternately, connect a USB to PS/2 connector to the USB hub then plug in your keyboard to the purple and green PS/2 connectors.
- Connect an Ethernet cable from your Pi to your wifi network router.
- Connect the USB to Mini-USB power plug to your Pi. Your Pi should display a red light near the two USB connections to indicate your Pi is alive.
- Switch the computer monitor or TV to HDMI mode (or DVI if you use the HDMI to DVI cable). The initial RaspberryPi installation screen should appear with a list of operating systems (if NOOBS from RaspberryPi.org).
4. Install the Operating System (NOOBS) on the Pi
To install an operating system from NOOBS, use your mouse to select Debian and then, at the bottom of the screen, select the correct language. Click the Install button, or press the i key on your keyboard, to start the installation process.
After a few long moments of thinking, your screen will reboot and display the command line mode with a stream of commands as the operating system initializes and boots up. The last step presents a command prompt request for the username (pi) and password (raspberry). The bottom of this article includes steps to change your password, among other useful tasks.
5. Update Your Operating System
Once logged in to your Pi, the first step is to confirm internet connectivity through your Ethernet cable connected from your Pi to your network router. Type this command into your command prompt:
sudo ping raspberrypi.org
You should receive a string of output messages. Type Control C on your keyboard to exit the ping command. If you get an error message, check both your Ethernet connection plugs and use another computer to confirm your wifi connects to the internet.
Type this command into your command prompt to update your Pi software:
sudo apt-get update
When this command completes, type this command to install any updates:
sudo apt-get upgrade
6. Download Sonic Pi Software
Sonic Pi is an easy to learn project that teaches music and basic programming concepts like loops and timers. For younger kids, especially, Sonic Pi is a fun way to demonstrate how software really works and to let kids create actual code and hear the results of their coding efforts.
To install Sonic Pi to a Pi connected to the internet, type this command at the command prompt:
sudo apt-get update ; sudo apt-get install sonic-pi
This command will download (update) then install the sonic-pi application.
Getting Started with Sonic Pi
When you get the command prompt after sonic-pi is installed, type this command to display the desktop on your Pi:
startx
The Lightweight XDE desktop will appear momentarily. To display the Sonic Pi software, click the bottom left of the desktop to display a menu, select Education > and then select Sonic Pi.
Sonic Pi has three main buttons at the top left: a Play or Run button, a Stop button, and a Save button. Several work areas are on the left side, as tabs, and the results of what you play are displayed on the right side.
Creating and Playing Music with Sonic Pi
Because Sonic Pi is rather simple to figure out, the first command plays a note. Type this command into one of the worksheet tabs:
play 60
Press the enter key to run the command. You should hear a bell sound.
Next, try this set of commands:
play 60
play 60
play 60
play 60
What happens? Four notes. Now try this set of commands:
play 60
sleep 1
play 60
sleep 1
play 60
sleep 1
play 60
What happens? Four more notes but with silence between each note.
Let's really go nuts and type these commands:
play 60
sleep .5
play 60
sleep 1
play 60
sleep .5
play 60
Wow, that's exciting, isn't it? Teasing aside, you can see how easy it is to adapt two basic Sonic Pi commands, play and sleep.
Now let's add a simple loop with these commands:
2.times do
    play 60
    sleep 1
    play 60
    sleep 1
    play 60
    sleep 1
    play 60
end
This will play our notes twice as a set of notes and pauses.
Where can you learn more about the Sonic Pi syntax and language? The teaching resources provided on the Sonic Pi site are excellent, even if you're not a teacher and want to learn at your own pace. The Sonic Pi site also has a PDF file with all the possible functions listed in an API guide.
Because the number that follows the play command refers to a specific MIDI note which, in turn corresponds to a musical note, the Sonic Pi site and the Learn More section below include a link to all possible MIDI notes. What is most fun, however, is taking all of these reference materials and simply trying different combinations.
Finally, I've also researched a few songs converted to MIDI to help you translate familiar songs into code for Sonic Pi.
More Raspberry Pi Magic
In addition to setting up your Raspberry Pi, you also might want to connect your board wirelessly to the internet, have the ability to connect to your board from another computer, reset your password, and perhaps change the name of your Pi board. These steps are described below.
Connect Your Pi Wireless USB Tab to Internet
As noted above, when you install the operating system on your Pi, you need to connect to your wifi router with an Ethernet cable. With the Ethernet connected, your WiFi USB tab in one of the two Pi USB slots, and your Pi displaying the command prompt, type this command to start the desktop software:
startx
The Lightweight XDE desktop includes a WiFi Config button on the left side. Double-click this icon to display the wpa_gui popup screen. Then follow these steps:
- On the Current Status tab, click the Scan button. The Scan results popup will display.
- Double-click the name of your wifi connection in the list on the Scan results popup. The Network popup will appear.
- Type the network wifi password in the PSK field of the Network popup form.
- Click the Add button at the bottom of the Network popup form. The Network form disappears.
- Click the Close button on the Scan results popup. The Scan results popup disappears. The Current Status tab should display your network ID (SSID) pre-selected in a drop-down list.
- Select wlan0 if the Adapter drop down list does not have it selected.
- Click the Connect button on the Current Status tab to connect your Pi wirelessly to your wifi router.
- At the top left of the wpa_gui popup screen, select the File menu and Save Configuration submenu.
To test your saved wireless settings, disconnect the Ethernet cable and call up the web browser (usually located bottom left of the desktop) in the XDE desktop.
To return to the command prompt, click the Logout button at the bottom right of the XDE desktop. At the command prompt, either or both of these commands can be used to test your new wireless connection:
ifconfig
ping raspberrypi.org
When the ifconfig command displays results, check the wlan0 entry has an IP address defined for the inet addr: entry, usually on the second line of the wlan0 results. If there is no IP address assigned, repeat the steps above, starting with typing the startx command to start the XDE desktop.
I found connecting the WiFi USB tab worked best this way, connecting first with Ethernet, updating the operating system, then using the startx command to display the desktop and then double-clicking the WiFi Config icon to configure the wireless connection. There are other ways, for example, by modifying the interfaces file, but I found the documentation online to be light and, in some cases, incorrect. Part of what makes Raspberry Pi so wonderful is ease of use. The wireless connectivity bit can be very simple to configure if you use the Pi desktop software after upgrading the operating system.
Learn More
Raspberry Pi
http://www.raspberrypi.org/
http://www.raspberrypi.org/wp-content/uploads/2012/04/quick-start-guide-v2_1.pdf
Arduino
http://arduino.cc/
http://fullyc.com/14-cool-arduino-projects-that-will-make-your-life-awesome/
BeagleBone
http://beagleboard.org/Products/BeagleBone
Sonic Pi
http://www.cl.cam.ac.uk/projects/raspberrypi/sonicpi/
https://github.com/samaaron/sonic-pi/wiki/Getting-Started
http://www.cl.cam.ac.uk/projects/raspberrypi/sonicpi/media/sonic-pi-cheatsheet.pdf
http://www.cl.cam.ac.uk/projects/raspberrypi/sonicpi/teaching.html
Sonic Pi Tutorial with Ms Philbin
http://www.raspberrypi.org/archives/5065
http://www.raspberrypi.org/archives/5065
Ms Philbin on Running Pi Workshops for Kids
http://misscphilbin.blogspot.co.uk/2013/11/running-raspberry-pi-workshop-for-young.html
Operating Systems for Raspberry Pi
Google+ Community for Raspberry Pi
Lots of neat ideas for how to use your Pi.
https://plus.google.com/+raspberrypi/posts
RPi Hub
Great Pi documentation, including pages to verify if a device will work with your Pi.
http://elinux.org/RPi_Hub
http://elinux.org/RPi_VerifiedPeripherals
Thingiverse
3D printing plans for your Pi, usually cases.
http://www.thingiverse.com/search/page:1?q=Raspberry+Pi&sa=
Raspberry Pi for Beginners
A free online presentation with basic information about how to get started with Pi.
http://oreillynet.com/pub/e/2912
http://event.on24.com/r.htm?e=679186&s=1&k=AEEE48C646BFE8FD4FF98D3C7FE5A21E
Arduino vs BeagleBone vs Raspberry Pi
http://makezine.com/2013/04/15/arduino-uno-vs-beaglebone-vs-raspberry-pi/
http://developmentboards.blogspot.com/2013/04/raspberry-pi-vs-arduino-vs-beagleboard.html
http://lifehacker.com/how-to-pick-the-right-electronics-board-for-your-diy-pr-742869540
Google Coder (Raspberry Pi)
http://gigaom.com/2013/09/13/google-and-raspberry-pi-join-forces-to-create-coder/
Make Your Garage Door Email, Tweet, or SMS
http://www.richlynch.com/2013/07/27/pi_garage_alert_1/
http://www.richlynch.com/2013/08/04/pi_garage_alert_2/
Remote Connection to Raspberry Pi
http://www.instructables.com/id/Setting-up-a-VNC-Server-on-your-Raspberry-Pi/?ALLSTEPS
http://elinux.org/RPi_VNC_Server
http://www.tightvnc.com/download.php
How to Rename Your Pi
www.raspberrypi-spy.co.uk/2012/11/how-to-rename-your-raspberry-pi/
Build a Raspberry Pi Case with Legos
http://www.raspberrypi.org/archives/1354
http://www.raspberrypi.org/archives/1515
http://tdb.brickowl.com/store/the-daily-brick-case-for-raspberry-pi-set
20 Awesome Projects for Raspberry Pi Microcomputers
http://www.treehugger.com/slideshows/gadgets/20-awesome-projects-raspberry-pi-microcomputers/
Teaching Cassandra Cluster Setups with the Raspberry Pi
“The Cassandra database is designed so that large clusters of systems can hold massive amounts of data. So why is a University of Dundee lecturer running it on the tiny $25 ARM-based Raspberry Pi?” Good question. Great answer.
https://www.linux.com/news/embedded-mobile/mobile-linux/747326-teaching-cassandra-cluster-setups-with-the-raspberry-pi-
Simple Raspberry Pi Shutdown Button
http://www.instructables.com/id/Simple-Raspberry-Pi-Shutdown-Button/?ALLSTEPS