


Do you ever wonder, despite your “DANGER KEEP OUT” sign, if people are going into your room? The door watcher is a way of keeping track of how many times your door has been opened whilst you aren’t there. It isn’t an alarm and it can’t tell you who has been in but, if you suspect a sibling is sneaking in to borrow your stuff, it might be a useful tool to begin your investigations!
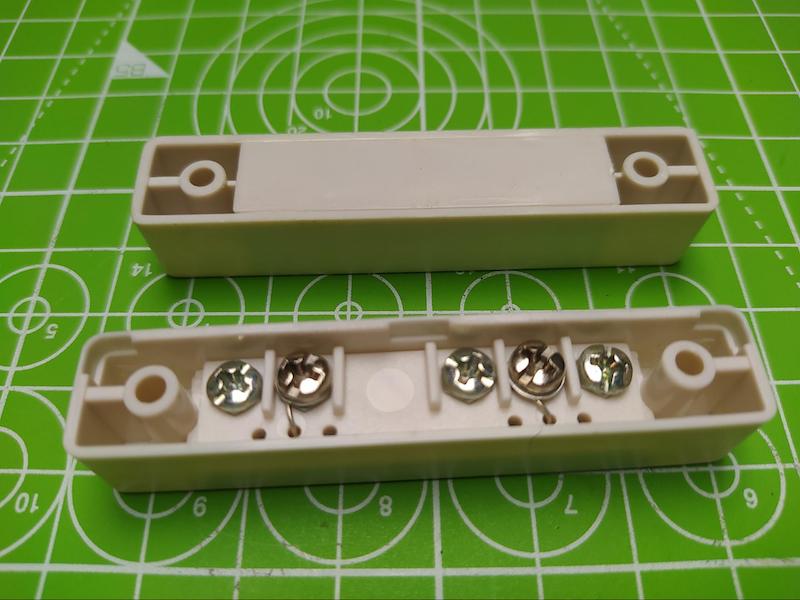
We are going to use a micro bit, some crocodile clips and a magnetic reed switch which are sold for a couple of dollars and often referred to as “door and window sensors”. This sensor is made from 2 plastic blocks. One block has some screw terminals on the back to attach wires too and this one is the reed switch. A reed switch is a pair of thin flexible metal strips that, in the presence of the magnet, are pulled together to close the switch and a signal can run through it. When the reed switch is moved away from the magnet the switch is opened. The other block doesn’t have any screw attachments and is simply a plastic block with a magnet inside. Our sensor blocks had 2 small arrows pointing that should be pointed at each other in order for the magnet and reed switch to work correctly.
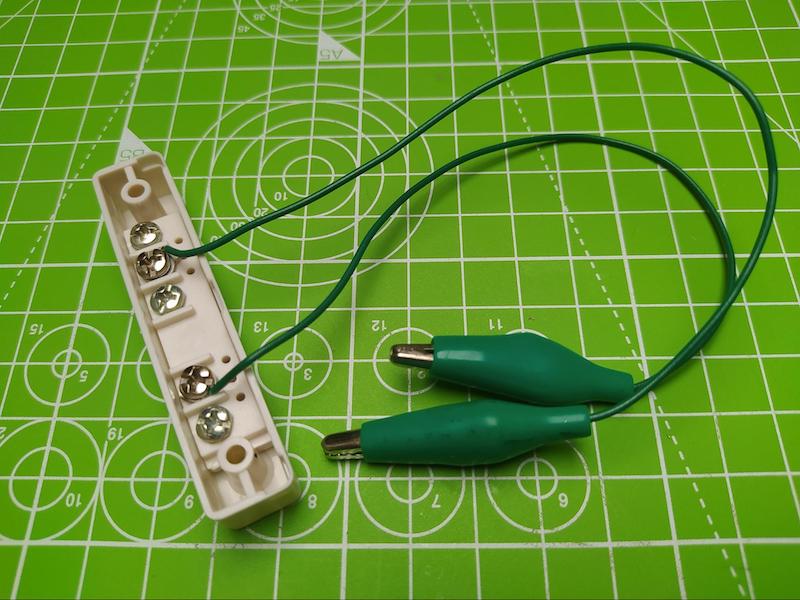
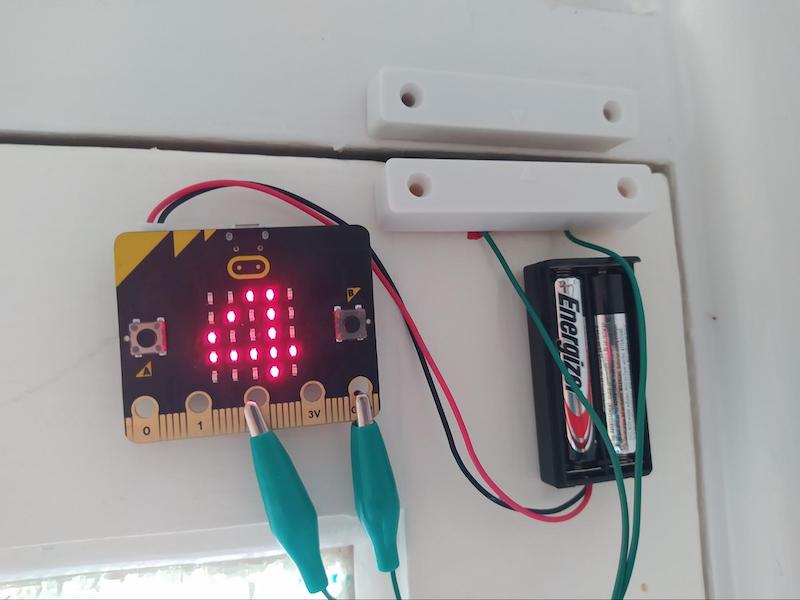
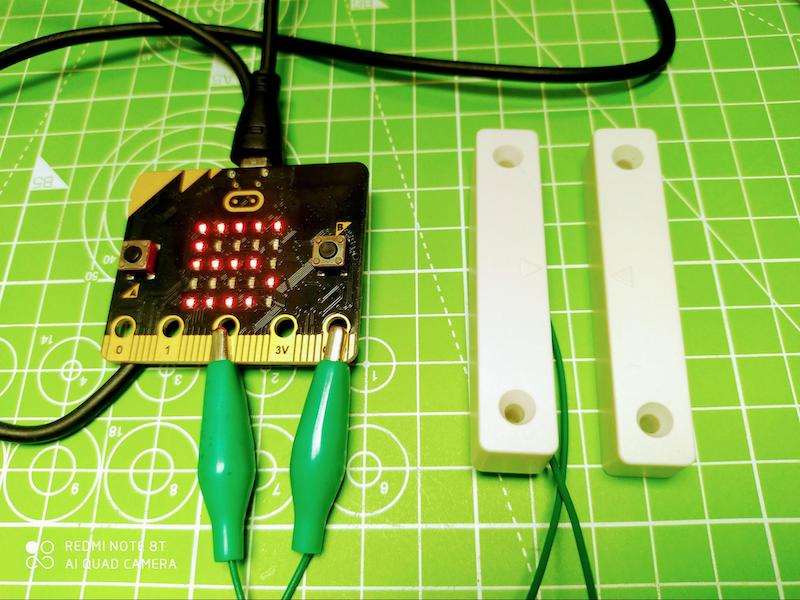
We sacrificed a wire with crocodile clips on each end by cutting it in half and stripping back a little section of bare wire on the cut ends. Next we clamped the wires to the screw terminals on the reed switch block. We connected our switch using the crocodile clips to pin 2 on the microbit and the ground connection (GND), It doesn’t matter which way the switch is connected.
To make the code for our door watcher we used the online Makecode editor. We first created a variable called that we called “counter”. To do this go to the variables menu and click “make a variable”. You should now see that there are some blocks to do with your variable “counter” available for you to use in your code. Drag a “set counter to 0” block and put it into the “on start block”. This means that when your door watcher is turned on the counter variable is set to zero.
Next we are going to go to the “input” menu and click the “more” sub menu and grab an “on pin0 released” block. Change the pin number in this block to the pin we have attached our reed switch too, pin 2. Inside the “on pin2 released” block we are going to insert a “change counter by ?” block and set it to change counter by “1”. This means that every time our pin 2 is released (which happens in our case when the switch block is moved away from the magnet block) the variable “counter” will increase by 1.
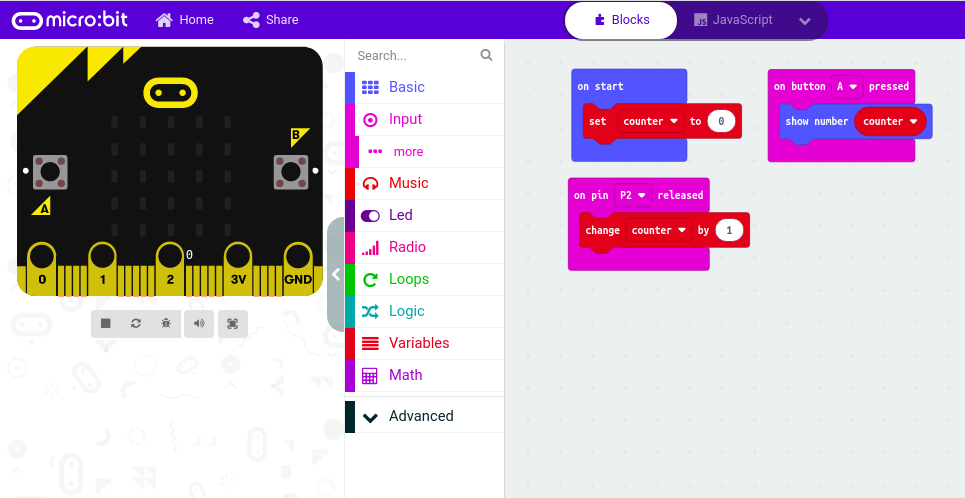
We could have the micro bit LED display showing the number of times the door as been open all the time, but perhaps the glowy LEDs would make it a bit obvious! We made our door watcher so that it only shows the number of times the door has been opened when button a on the micro bit is pressed. To do this we simply added a “on button A pressed” block and inside it added a “show number block (in the basic menu) and changed the variable for it to show to “counter” by dragging a copy of the variable into the block.
Once you have the code blocks set up on the editor, save and download the hex file. Connect your micro bit to your computer using the USB cable and it should appear as a USB drive. Copy and paste the hex file you just created and downloaded over to the micro bit USB drive and it should automatically flash the code to the micro bit. Separate and join the sensor blocks a few times and press the A button to check that it’s all working. We found that our sensor blocks worked well with up to around a 3cm gap between them.
Having checked that everything was working we then mounted our door watcher on our door using some double sided sticky tape to hold the parts in place (meaning we could remove it later). We used the micro bit battery pack this meant we could switch it on and off as and when we needed it. Of course when you turn the door watcher on and leave the room and re enter later on you will add 2 counts that you’ll need to remove later on when you check how many people have dared to enter your room!
Finally, this door watcher is a great starter project, but it got us thinking about how it could be improved, perhaps the addition of a “Real Time Clock” module so you could discover the times that the door has been opened? Or even a remote alarm that sends a signal to another micro bit so you could be informed that your door has been opened when you are somewhere else in the house?
Learn More
Reed Switch
https://en.wikipedia.org/wiki/Reed_switch
How Reed Switches Work
https://www.explainthatstuff.com/howreedswitcheswork.html
What is a Reed Switch?
https://www.first4magnets.com/blog/what-is-a-reed-switch-and-which-magnets-operate-them/
How to make a magnetic reed switch
https://www.youtube.com/watch?v=hsDpE9diu2s
Mechanisms: The Reed Switch
https://hackaday.com/2018/03/01/mechanisms-the-reed-switch/#more-293407
Sensor facts for kids
Magic Button Trick
http://chibibit.io/ide/docs/projects/magic-button-trick.html