


FOR THIS PROJECT YOU WILL NEED
- A computer running Windows, macOS or Linux
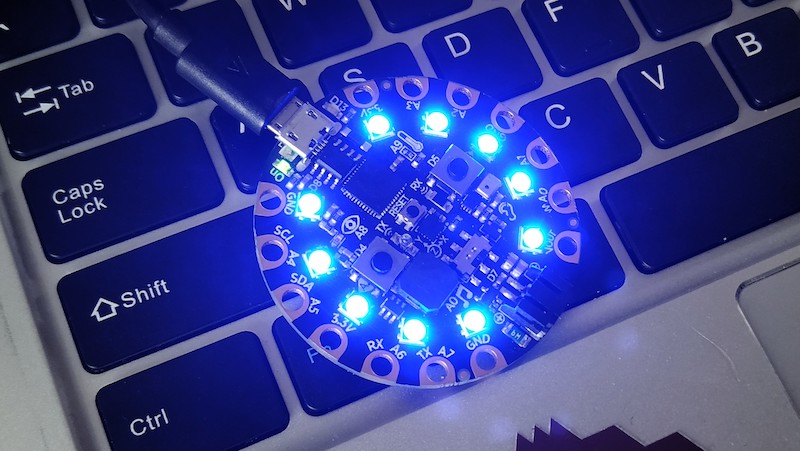
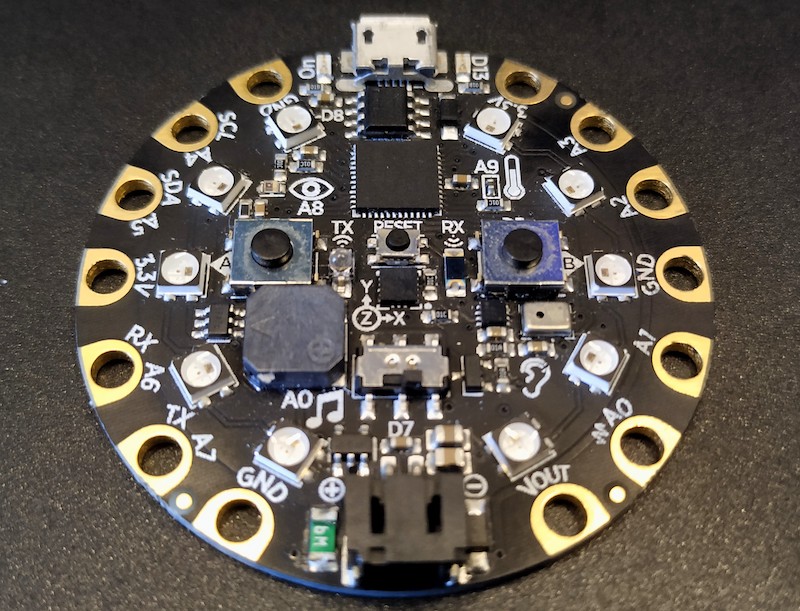
- An Adafruit Circuit Playground Express (CPX)
- Mu installed on your computer
CircuitPython is marvellous as it enables anyone to write code which will run hardware projects both big and small. But how can we learn more about CircuitPython? Well the best way is to create a simple game and step through each part of the game explaining what we want to happen.
The simplest game to do this is a reaction game. And luckily the Circuit Playground Express board from Adafruit has everything we need. Two buttons for user input and 10 Neopixel LEDs which can be any color that we wish.
So in this project we shall have a two player reaction game, where the red team are assigned button A, and the green team button B. When the Neopixels change color to blue, the fastest player will win the round and turn the LEDs to their team color.
In this project we will learn:
- How to write CircuitPython code
- How to use the Circuit Playground Express board
- How to control Neopixels
- How to handle user input
Getting Started
We shall write this project using CircuitPython, a version of Python for microcontrollers maintained by Adafruit. If you can already write Python, then you can write CircuitPython. But if you are new to Python, fear not! We shall go through this project step by step.
Connect you Circuit Playground Express (CPX) to your computer using a good quality micro USB cable. Start Mu and it should automatically detect your CPX board.
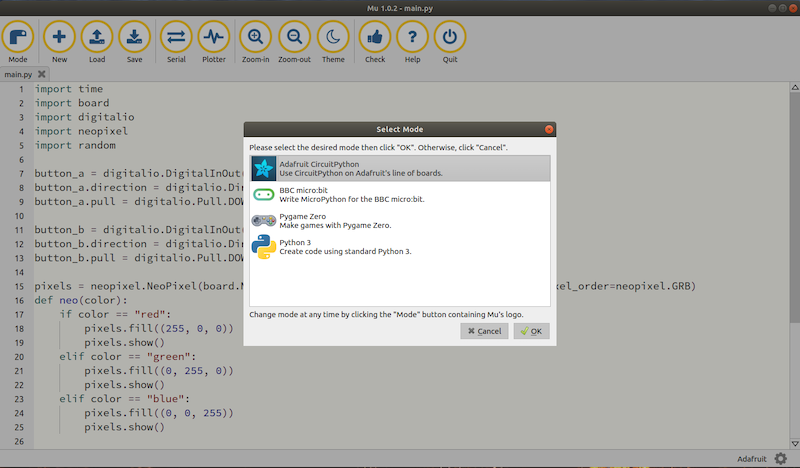
If not then click on Mode and select Adafruit CircuitPython.
We start our CircuitPython code with five library imports. These enable extra functions in our code. Time is used to create a delay in the code. Board enables our code to use components, such as Neopixel LEDs on the board. Digitalio enables the use of buttons A and B on the board. Neopixel is a special library to control the 10 multicolor LEDs on the board. Finally random is a special library used to add a little chaos to our game!
import time
import board
import digitalio
import neopixel
import random
So how does our code know where the buttons are, and what they will do? Well we need to tell the code just that. We create an object called “button_a” and in there we tell the code where to find that button, which is “board.BUTTON_A” a button on the CPX. Then we tell the code that this will be an input, and that it’s resting state (when untouched) is DOWN, which means off.
We also create a similar object for “button_b”.
button_a = digitalio.DigitalInOut(board.BUTTON_A)
button_a.direction = digitalio.Direction.INPUT
button_a.pull = digitalio.Pull.DOWN

button_b = digitalio.DigitalInOut(board.BUTTON_B)
button_b.direction = digitalio.Direction.INPUT
button_b.pull = digitalio.Pull.DOWN
To control the Neopixels, the 10 multi colored LEDs around the CPX, we need to tell the code where to find them and what to do. So creating an object called “pixels” we then call the “neopixel.NeoPixel” function and pass it a number of instructions.
The first of these instructions tells the function that we are using the Neopixels on the CPX board. Then we tell the function how many Neopixels there are (10) on the board, and that their brightness should be 0.2, quite low but clearly visible. The next instruction tells the code that any changes should not be automatically written to the Neopixels. Lastly the Neopixels on the CPX use Green, Red, Blue as the order for their colors.
pixels = neopixel.NeoPixel(board.NEOPIXEL, 10, brightness=0.2, auto_write=False, pixel_order=neopixel.GRB)
To make controlling the Neopixels a little easier, we shall create our own function. A function is a block of code which can be run when its name is used. Here we use the name “neo” for our function and pass an argument (an extra instruction) which will be the color that we wish the Neopixels to be. Inside the function if the color argument is “red” then all of the Neopixels are set to red using the numbers 255,0,0. In order to see this change we must then show it. The same process applies for the colors green and blue.
def neo(color):
    if color == "red":
        pixels.fill((255, 0, 0))
        pixels.show()
    elif color == "green":
        pixels.fill((0, 255, 0))
        pixels.show()
    elif color == "blue":
        pixels.fill((0, 0, 255))
        pixels.show()
We are now finished writing the code for the function, and we are now back in the main code. We create a variable called “delay” and in there we store a randomly generated number between 3 and 6. But why 3 and 6? Well this generates a random delay for our game, with 6 seconds being the maximum time and 3 as the minimum.
The “random.uniform” function will pick the number as a float, so the delay could be 3.11145, 5.67 etc. This is then stored in the variable, which is then used on the next line with the “time.sleep” function. This will pause the code for that random time, before calling our “neo()” function with the color blue. Signifying that the players should press their button.
delay = random.uniform(3,6)
time.sleep(delay)
neo("blue")
So now we reach the section where the players reaction is checked! In a while True loop so that we constantly run a conditional statement made up of two if’s. If the fastest player was red team, button A, then the value of button A goes from 0 (unpressed) to 1 (pressed) and if that happens then the “neo()” is called and we tell the Neopixels to light up red. The code then pauses for 3 seconds to enable the players to see the winner, lastly the code ends using “break” to stop the loop. The second if conditional test is for the green team on button B.
while True:
    if button_a.value == 1:
        neo("red")
        time.sleep(3)
        break
    if button_b.value == 1:
        neo("green")
        time.sleep(3)
        break
Save and run the code
With all of the code completed, now we can save the code to the CPX as “main.py”. Luckily Mu is great for working with CPX and CircuitPython devices. Once the file is saved the CPX will reset and run the code. So get ready because as soon as the Neopixels turn blue, you will have to press your button first to win!
To replay the game just press the reset button and the code will run once again. Well done, you have made your own reaction game using CircuitPython on Adafruit’s Circuit Playground Express.
So what have we learnt?
- How to write CircuitPython
- How to use the Circuit Playground Express board
- How to react to input
- How to show simple output with Neopixels
- How to create random elements in a game
Learn More
CircuitPython
Adafruit CircuitPython
https://www.adafruit.com/circuitpython
Neopixels
CircuitPython Raspberry Pi
https://www.raspberrypi.org/magpi/control-servos-circuitpython-raspberry-pi/
Game Making
https://educators.brainpop.com/student-made-games-2-game-making/